In this tutorial you will learn how to create a Windows Forms Data Source from an Entity in an Entity Data Model. This tutorial assumes that you have installed the World example database, which can be downloaded from the MySQL Documentation page. You can also find details on how to install the database on the same page. It will also be convenient for you to create a connection to the World database after it is installed. For instructions on how to do this see Section 22.2.3.1, “Making a connection”.
Creating a new Windows Forms application
The first step is to create a new Windows Forms application.
In Visual Studio, select , , from the main menu.
Choose the Windows Forms Application installed template. Click . The solution is created.
Adding an Entity Data Model
You will now add an Entity Data Model to your solution.
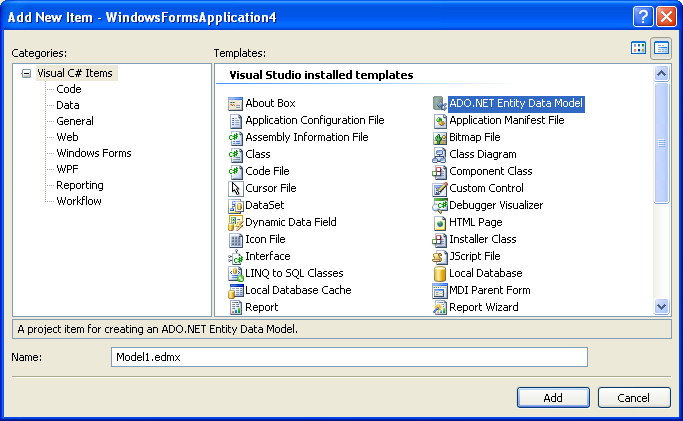
In the Solution Explorer, right-click your application and select , . From Visual Studio installed templates select ADO.NET Entity Data Model. Click .
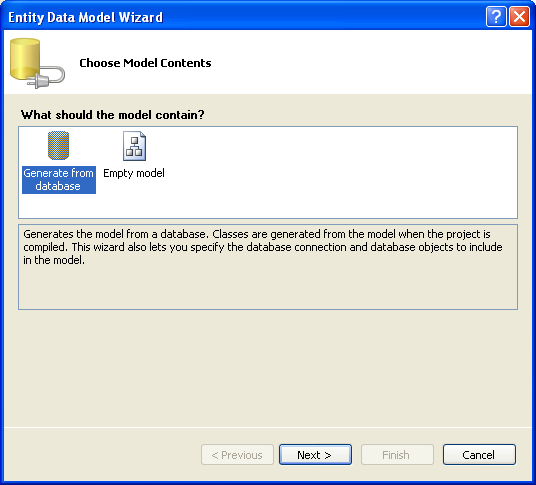
You will now see the Entity Data Model Wizard. You will use the wizard to generate the Entity Data Model from the world example database. Select the icon Generate from database. Click .
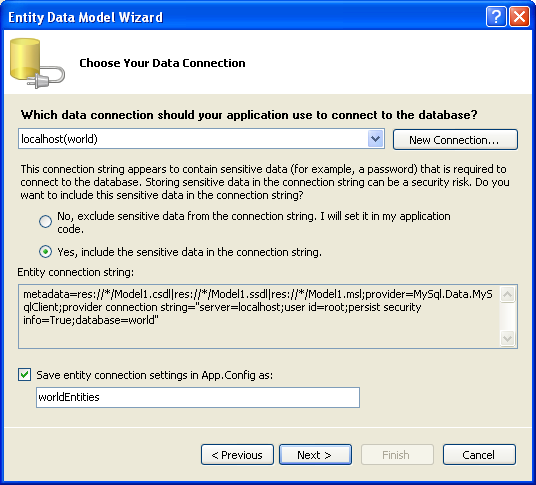
You can now select the connection you made earlier to the World database. If you have not already done so, you can create the new connection at this time by clicking . For further instructions on creating a connection to a database see Section 22.2.3.1, “Making a connection”.
Make a note of the entity connection settings to be used in App.Config, as these will be used later to write the necessary control code.
Click .
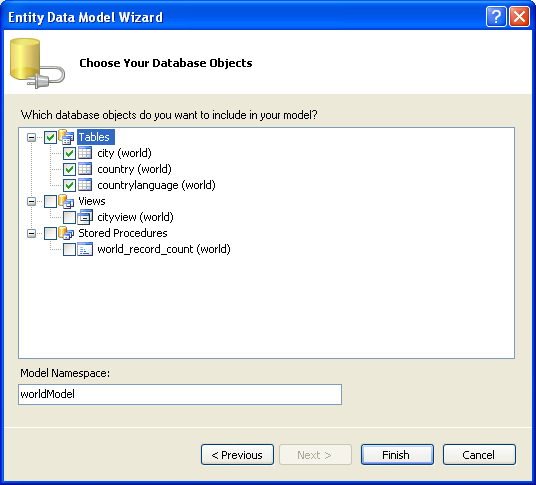
The Entity Data Model Wizard connects to the database. You are then presented with a tree structure of the database. From this you can select the object you would like to include in your model. If you had created Views and Stored Routines these will be displayed along with any tables. In this example you just need to select the tables. Click to create the model and exit the wizard.
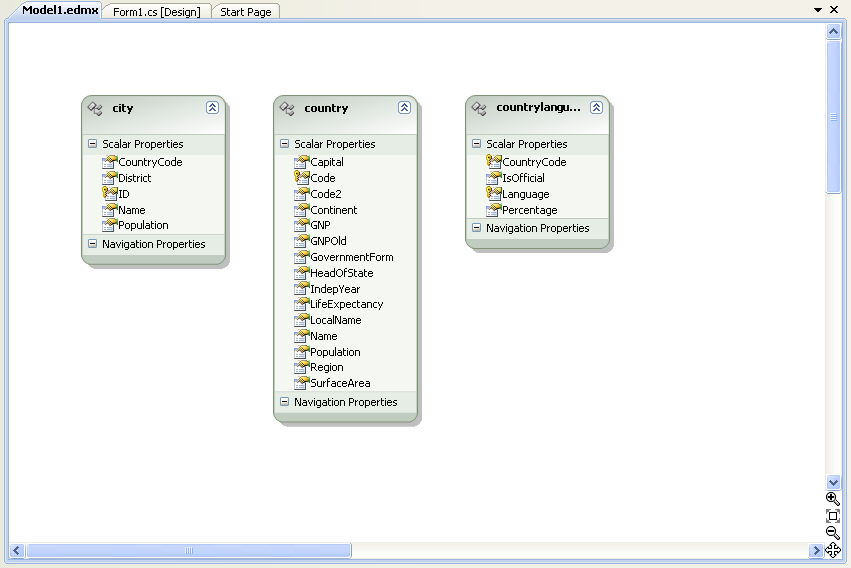
Visual Studio will generate the model and then display it.
From the Visual Studio main menu select , , to ensure that everything compiles correctly so far.
Adding a new Data Source
You will now add a new Data Source to your project and see how it can be used to read and write to the database.
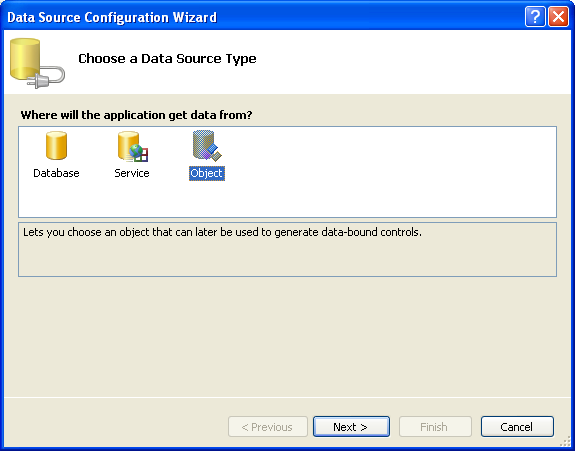
From the Visual Studio main menu select , . You will be presented with the Data Source Configuration Wizard.
Select the Object icon. Click .
You will now select the Object you wish to bind to. Expand the tree. In this tutorial you will select the city table. Once the city table has been selected click .
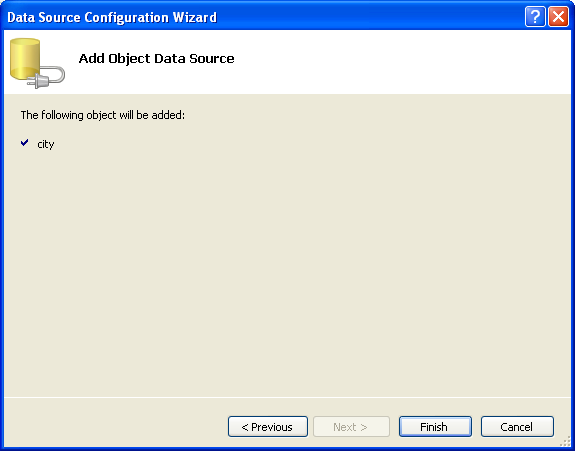
The wizard will confirm that the city object is to be added. Click .
The city object will be display in the Data Sources panel. If the Data Sources panel is not displayed, select , from the Visual Studio main menu. The docked panel will then be displayed.


Using the Data Source in a Windows Form
You will now learn how to use the Data Source in a Windows Form.
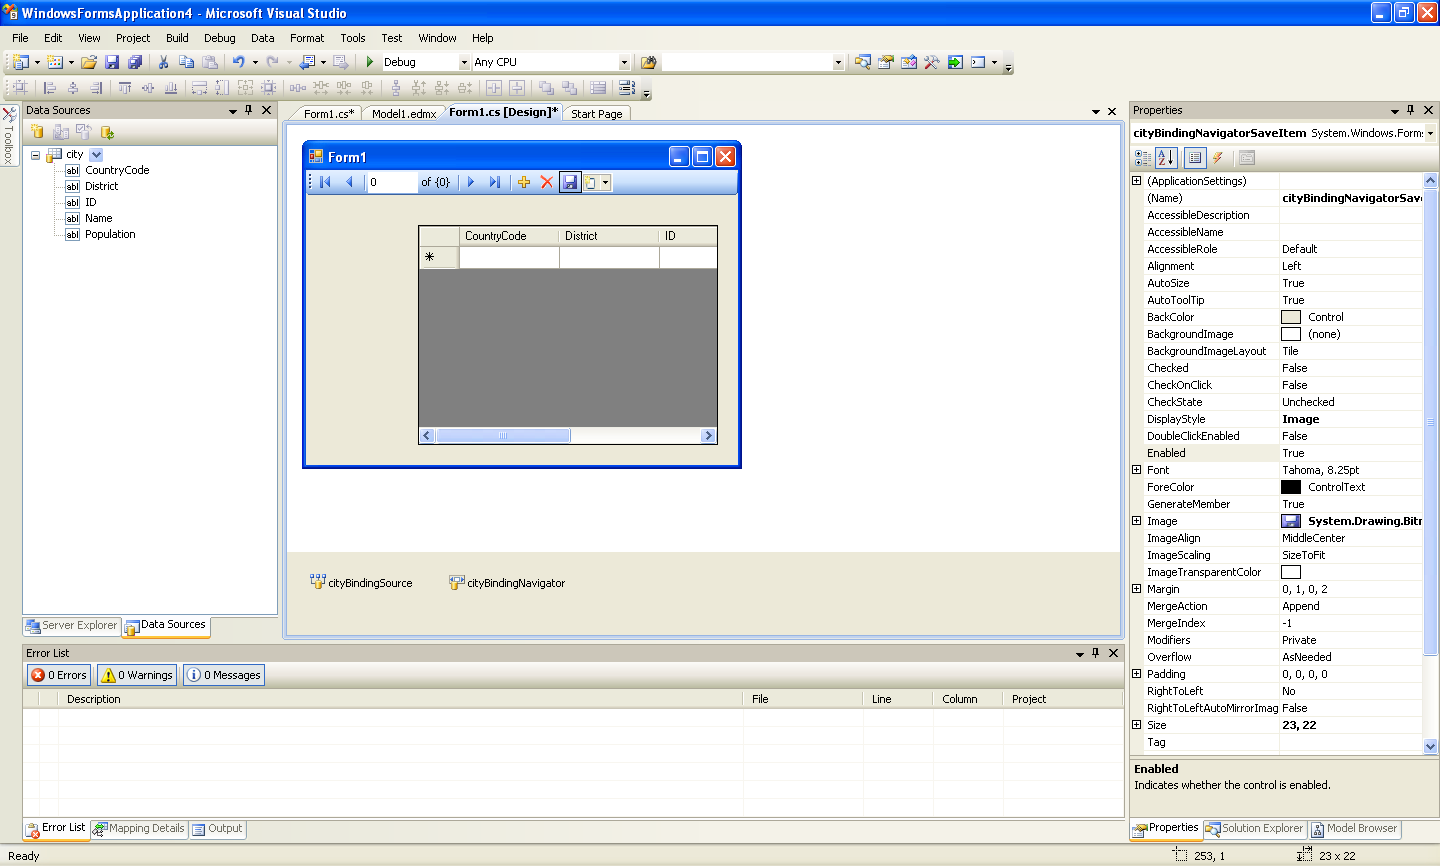
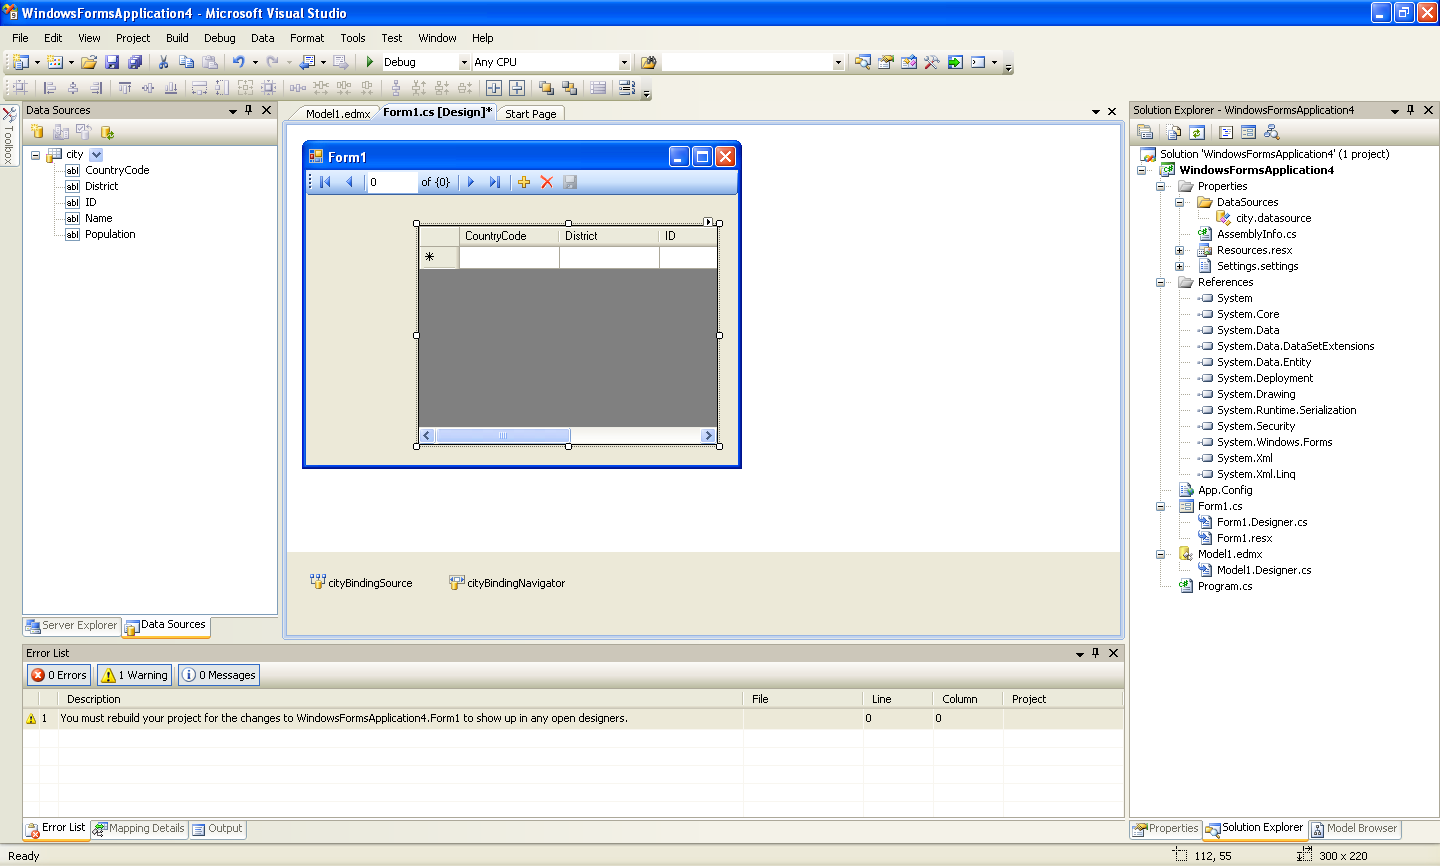
In the Data Sources panel select the Data Source you just created and drag and drop it onto the Form Designer. By default the Data Source object will be added as a Data Grid View control. Note that the Data Grid View control is bound to the
cityBindingSourceand the Navigator control is bound tocityBindingNavigator.Save and rebuild the solution before continuing.
Adding Code to Populate the Data Grid View
You are now ready to add code to ensure that the Data Grid View control will be populated with data from the City database table.
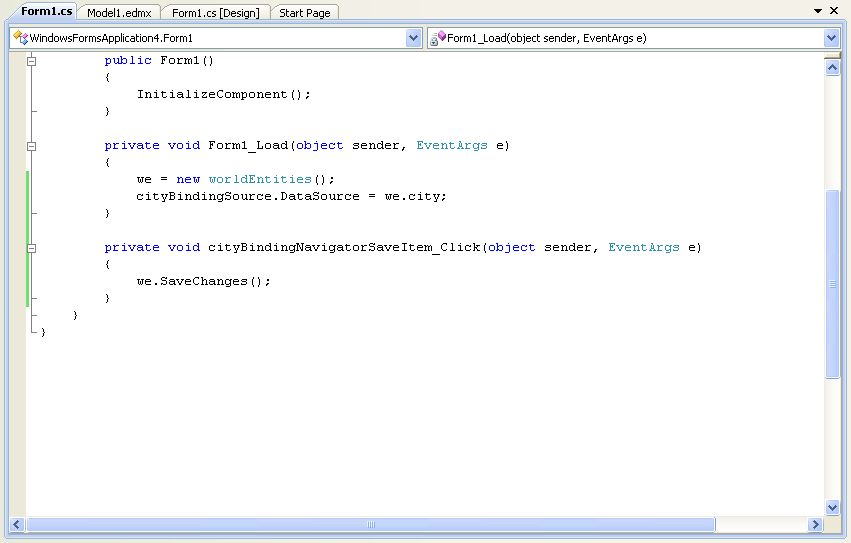
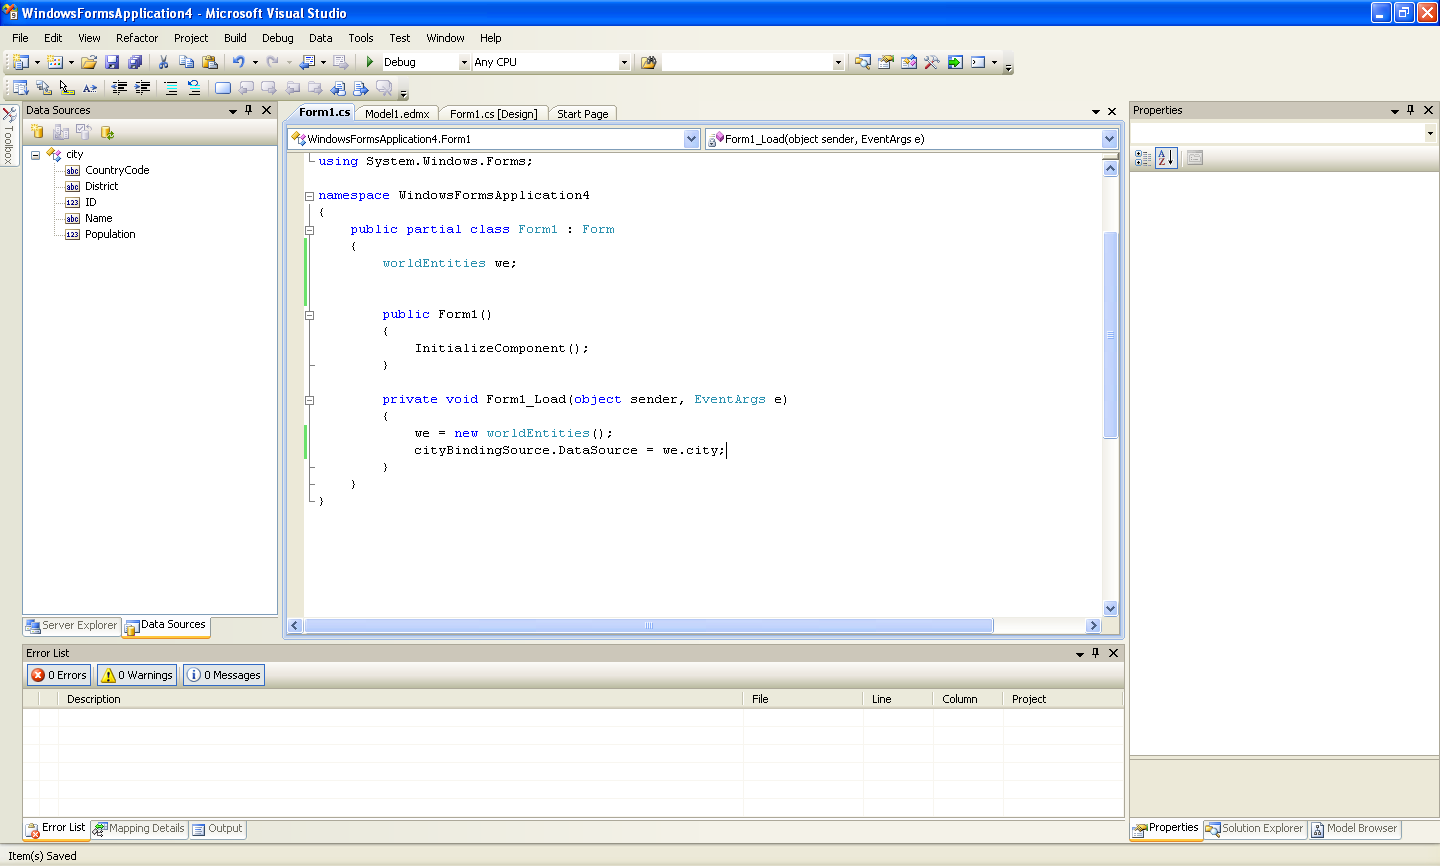
Double-click the form to access its code.
Add code to instatiate the Entity Data Model's EntityContainer object and retrieve data from the database to populate the control.
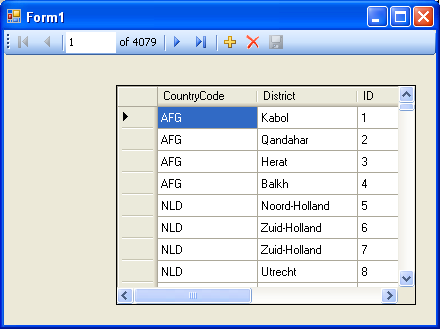
Save and rebuild the solution.
Run the solution. Ensure the grid is populated and you can navigate the database.
Adding Code to Save Changes to the Database
You will now add code to enable you to save changes to the database.
The Binding source component ensures that changes made in the Data Grid View control are also made to the Entity classes bound to it. However, that data needs to be saved back from the entities to the database itself. This can be achieved by the enabling of the Save button in the Navigator control, and the addition of some code.
In the Form Designer, click the Save icon in the Form toolbar and ensure that its Enabled property is set to True.
Double-click the Save icon in the Form toolbar to display its code.
You now need to add code to ensure that data is saved to the database when the save button is clicked in the application.
Once the code has been added, save the solution and rebuild it. Run the application and verify that changes made in the grid are saved.