You can migrate the data generated during a MySQL Enterprise Monitor 1.3.x installation using the Data Migration functionality of the Server Configuration panel.
To use the data migration feature, you must have installed MySQL Enterprise Service Manager using an update installer. The update installer performs the initial migration of your configuration, rules, schedule, and events data. The historical data is not migrated until you explicitly request the migration of information within the Manage Servers section of the Settings panel.
Data migration works on a single server, allowing you to select on which servers you want to migrate information. The migration is subject to the following:
You must elect to migrate the data from each server individually.
Migration takes approximately 5-6 hours, for each month, for each server. Therefore, if you have six months of data on 10 servers it could take between 300 and 360 hours (15 days) to migrate all of your historical data one server at a time.
To limit the data migration, set the Data Purge Behavior within the Settings page. Only data more recent than the specified purge period is migrated. Data older than the purge period is ignored.
To prevent performance issues, migrate only one or a small number of servers concurrently.
You can start and stop the migration of the data at any time. As a general guide, you should avoid stopping the data migration process and allow it to complete unless:
Run out of disk space.
MySQL Enterprise Service Manager becomes too slow and unresponsive.
Migration never completes.
With the last item, where the migration never completes, occasionally there are some aspects of the data that cannot be migrated successfully. This prevents the migration process completing, but does not affect the conversion of any data that could be migrated.
Starting Historical Data Migration
To start data migration:
Switch to the Manage Servers display of the Settings panel within MySQL Enterprise Dashboard.
Ensure that the data migration functionality has been enabled. The and buttons next to Historical Data Migration are visible.
Select the servers you want to migrate by using the checkbox next to each server name. You can select one or more servers to migrate. Servers that are suitable for migration show their migration status within the Migration Status column. If the server cannot be migrated,
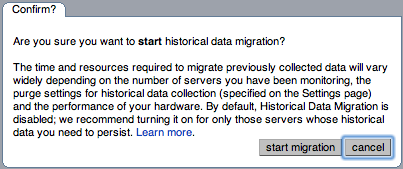
N/Ais shown.Click next to Historical Data Migration.
To start the migration, click in the confirmation dialog box. To cancel migration, click .
The servers to migrate show
Queued for
          Migration
in the Migration Status column.

Monitoring Historical Data Migration
You can check the migration status of any individual server by examining the Migration Status column for each server. You can see an example of the migration status below.
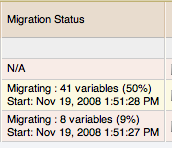
Note that the migration status is shown according to the state of migration at the time the page was loaded. The actual migration continues in the background, and the current state may not match the state of the migration at the time it is viewed.
Servers showing Done in the Migration
Status column have already completed their migration.
You can check the overall migration status by examining the Upgrade Status display.
Stopping Historical Data Migration
You can stop the migration process for any server that is still migrating data. The migration can be restarted at any time without causing any problems.
To stop the historical data migration:
Select the servers you want to stop migrating by using the checkbox next to each server name. You can select one or more servers to stop migrating.
Click next to Historical Data Migration.
You receive confirmation that the migration has been stopped, or a notification if migration has already completed.
Removing Old Data
Once data migration has been completed for all the servers you
want to migrate, you may want to delete or remove access to the
old data within your MySQL Enterprise Monitor repository. Data for MySQL Enterprise Monitor 1.3
was stored in a database called merlin within
the MySQL repository. Data for MySQL Enterprise Monitor 2.0 is stored within a
database called mem.
To create a backup of the old information, use mysqldump:
shell> mysqldump -uservice_manager -pPassword -P13306 -h127.0.0.1 merlin >data-1.3.sql
The above creates a file, data-1.3.sql
containing all of the MySQL Enterprise Monitor 1.3 information.
If you remove access to the old data, then the data migration
options for old servers are removed from the Manage
Servers panel within MySQL Enterprise Service Manager. To remove access,
REVOKE access to the merlin
database:
mysql& REVOKE ALL on merlin.* FROM 'service_manager';
Revoking access to the old data does not reclaim any of the disk space used by the old data.
To delete the data from the database and free up the space being
used by the historical information, DROP the
merlin database:
mysql& DROP DATABASE merlin;
Once all the data has been migrated you can hide the migration user interface by clicking the button.