Many web sites feature the facility for the user to create a user account. They can then log into the web site and enjoy a personalized experience. This requires that the developer creates database tables to store user information, along with code to gather and process this data. This represents a burden on the developer, and there is the possibility for security issues to creep into the developed code. However, ASP.NET 2.0 introduced the Membership system. This system is designed around the concept of Membership, Profile and Role Providers, which together provide all of the functionality to implement a user system, that previously would have to have been created by the developer from scratch.
Currently, MySQL Connector/NET provides Membership, Role, Profile and Session State Providers.
This tutorial shows you how to set up your ASP.NET web application to use the MySQL Connector/NET Membership and Role Providers. It assumes that you have MySQL Server installed, along with MySQL Connector/NET and Microsoft Visual Studio. This tutorial was tested with MySQL Connector/NET 6.0.4 and Microsoft Visual Studio 2008 Professional Edition. It is recommmended you use 6.0.4 or above for this tutorial.
Create a new database in the MySQL Server using the MySQL Command Line Client program (
mysql), or other suitable tool. It does not matter what name is used for the database, but it should be noted down so that it can be specified in the connection string constructed later in this tutorial. This database will contain the tables, automatically created for you later, used to store data about users and roles.Create a new ASP.NET Web Site in Visual Studio. If you are not sure how to do this, refer to the following tutorial: Section 22.2.4.6, “Tutorial: Databinding in ASP.NET using LINQ on Entities”, which demonstrates how to create a simple ASP.NET web site.
Add References to
MySql.DataandMySql.Webto the web site project.Locate the
machine.configfile on your system, which is the configuration file for the .NET Framework.Search the
machine.configfile to find the membership providerMySQLMembershipProvider.Add the attribute
autogenerateschema="true". The appropriate section should now resemble the following (note: for the sake of brevity some information has been excluded):<membership> <providers> <add name="AspNetSqlMembershipProvider" type="System.Web.Security.SqlMembershipProvider" ... connectionStringName="LocalSqlServer" ... /> <add name="MySQLMembershipProvider" autogenerateschema="true" type="MySql.Web.Security.MySQLMembershipProvider, MySql.Web, Version=6.0.4.0, Culture=neutral, PublicKeyToken=c5687fc88969c44d" connectionStringName="LocalMySqlServer" ... /> </providers> </membership>Note that the name for the connection string to be used to connect to the server that contains the membership database is
LocalMySqlServer.The
autogenerateschema="true"attribute will cause MySQL Connector/NET to silently create, or upgrade, the schema on the database server, to contain the required tables for storing membership information.It is now necessary to create the connection string referenced in the previous step. Load the web site's
web.configfile into Visual Studio.Locate the section marked
<connectionStrings>. Add the following connection string information:<connectionStrings> <remove name="LocalMySqlServer"/> <add name="LocalMySqlServer" connectionString="Datasource=localhost;Database=users;uid=root;pwd=password;" providerName="MySql.Data.MySqlClient"/> </connectionStrings>The database specified is the one created in the first step. You could alternatively have used an existing database.
At this point build the solution to ensure no errors are present. This can be done by selecting , from the main menu, or pressing F6.
ASP.NET supports the concept of locally and remotely authenticated users. With local authentication the user is validated using their Windows credentials when they attempt to access the web site. This can be useful in an Intranet environment. With remote authentication a user is prompted for their login details when accessing the web site, and these credentials are checked aganst the membership information stored in a database server such as MySQL Server. You will now see how to choose this form of authentication.
Start the ASP.NET Web Site Administration Tool. This can be done quickly by clicking the small hammer/Earth icon in the Solution Explorer. You can also launch this tool by selecting , from the main menu.
In the ASP.NET Web Site Administration Tool click the Security tab.
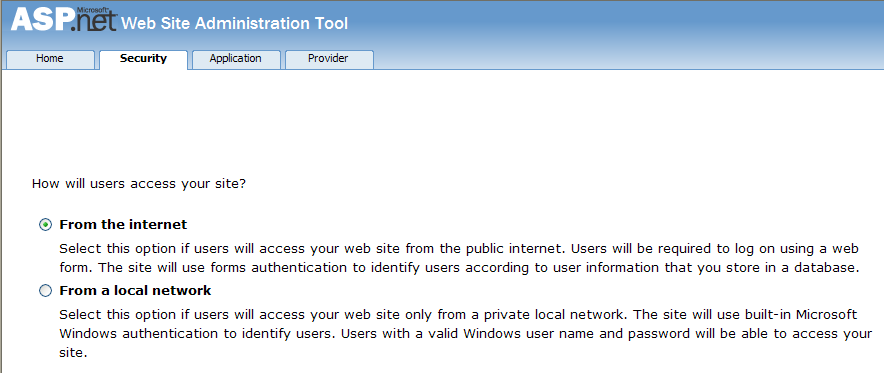
Now click the User Authentication Type link.
Select the From the internet radio button. The web site will now need to provide a form to allow the user to enter their login details. These will be checked against membership information stored in the MySQL database.
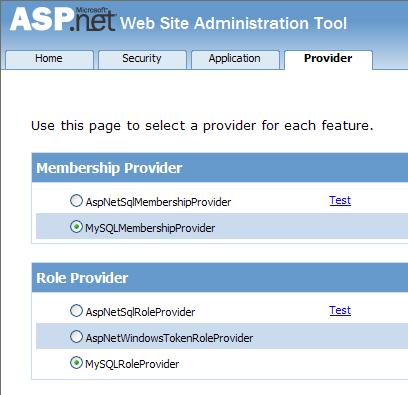
You now need to specify the Role and Membership Provider to be used. Click the Provider tab.
Click the Select a different provider for each feature (advanced) link.
Now select the MySQLMembershipProvider and the MySQLRoleProvider radio buttons.
In Visual Studio rebuild the solution by selecting , from the main menu.
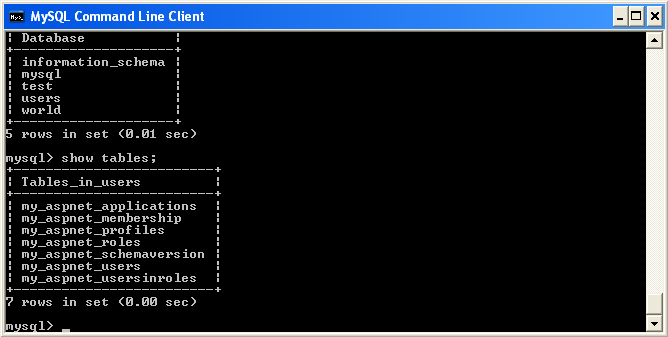
Check that the necessary schema has been created. This can be achieved using the MySQL Command Line Client program.
Assuming all is present and correct you can now create users and roles for your web application. The easiest way to do this is with the ASP.NET Web Site Administration Tool. However, many web applications contain their own modules for creating roles and users. For simplicity the ASP.NET Web Site Administration Tool will be used in this tutorial.
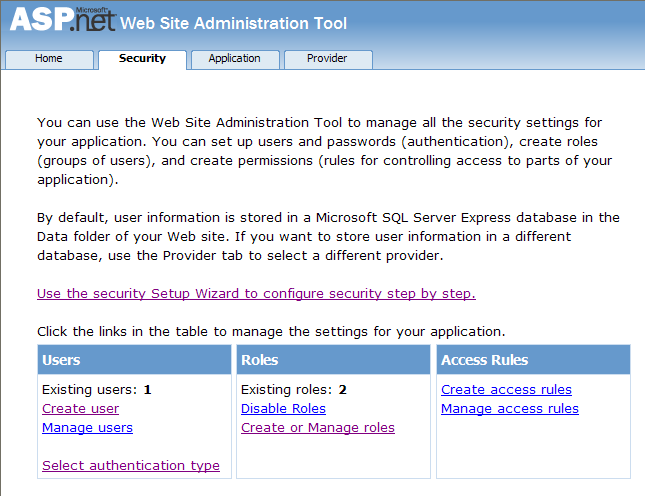
In the ASP.NET Web Site Administration Tool, click the Security tab. Now that both the Membership and Role Provider are enabled you will see links for creating roles and users. Click the Create or Manage Roles link.
You can now enter the name of a new Role and click to create the new Role. Create new Roles as required.
Click the button.
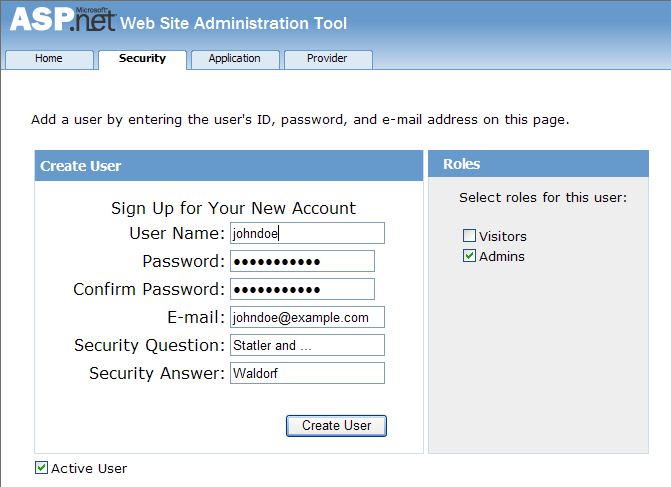
Click the Create User link. You can now fill in information about the user to be created, and also allocate that user to one or more Roles.
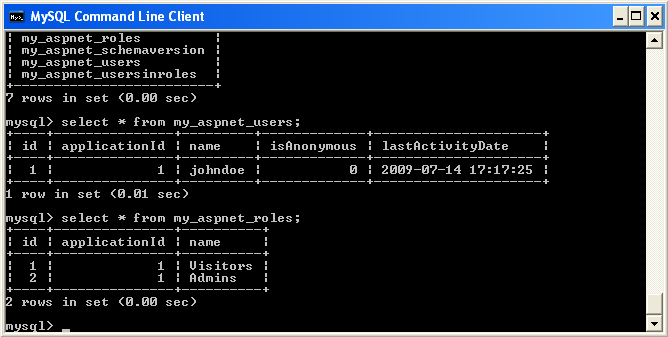
Using the MySQL Command Line Client program you can check that your database has been correctly populated with the Membership and Role data.
In this tutorial you have seen how to set up the MySQL Connector/NET Membership and Role Providers for use in your ASP.NET web application.