MySQL Connector/NET 6.1 introduced the MySQL Website Configuration Tool. This
is a facility available in Visual Studio that enables you to
configure the Membership, Role, Session State and Profile
Provider, without having to resort to editing configuration files.
You simply run the tool, set your configuration options, and the
tool will modify your web.config file
accordingly.
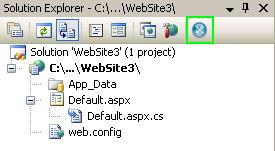
The MySQL Website Configuration Tool appears as a small icon on the Solution Explorer toolbar in Visual Studio, as show by the following screenshot:
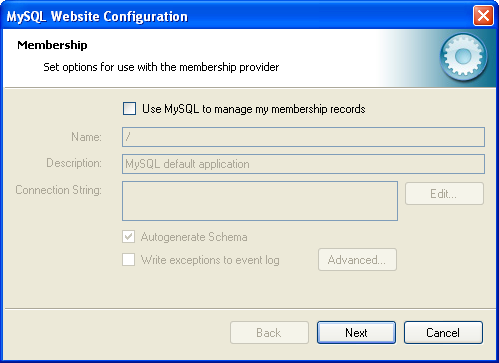
Clicking the Website Configuration Tool icon launches the wizard and displays the first screen:
This allows you to enable use of the MySQL Membership Provider. Simply click the checkbox to enable this. You can now enter the name of the application that you are creating the configuration for. You can also enter a description for the application.
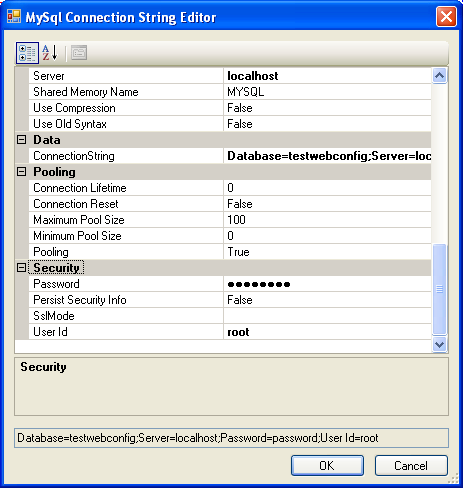
You can then click the button to launch the Connection String Editor:
Note that if you have already defined a connection string for the
providers manually in web.config, or
previously using the tool, this will be automatically loaded and
displayed, and can then be modified in this dialog.
You can also ensure that the necessary schema are created automatically for you by selecting the Autogenerate Schema checkbox. These schema are used to store membership information. The database used to storage is the one specified in the connection string.
You can also ensure that exceptions generated by the application will be written to the event log by selecting the Write excpetions to event log checkbox.
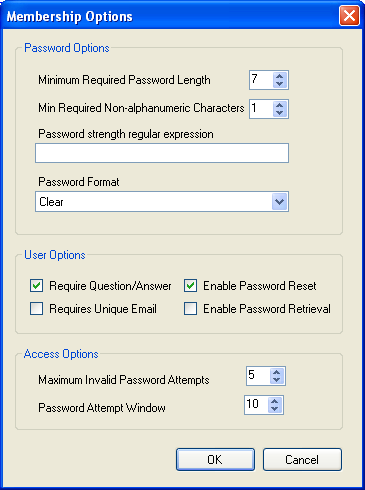
Clicking the button launches a dialog that enables you to set Membership Options. These options dictate such variables as password length required when a user signs up, whether the password is encrypted and whether the user can reset their password or not.
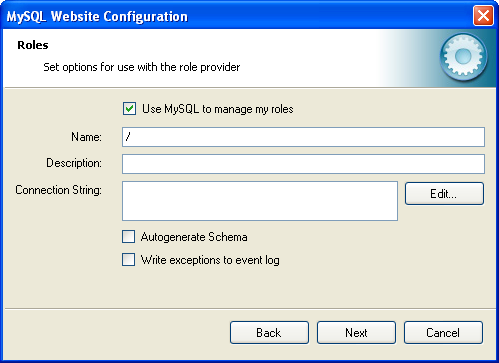
Once information has been set up as required for configuration of the Membership Provider the button can be clicked to display the Roles Provider screen:
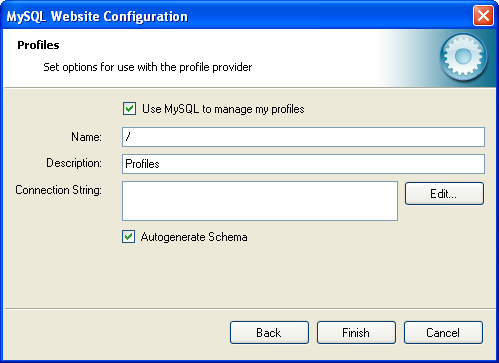
Again the connection string can be edited, a description added and Autogenerate Schema can be enabled before clicking to go to the Profiles Provider screen:
This screen display similar options to the previous screens.
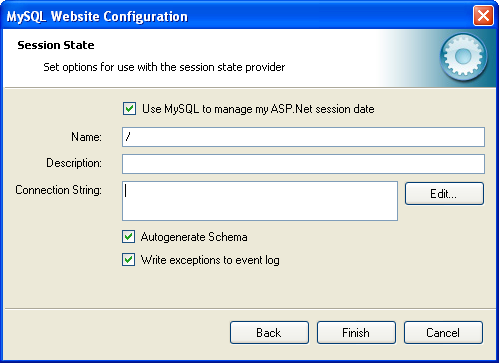
Click to proceed to the Session State configuration page:
Once you have set up the Session State Provider as required, click to exit the wizard.
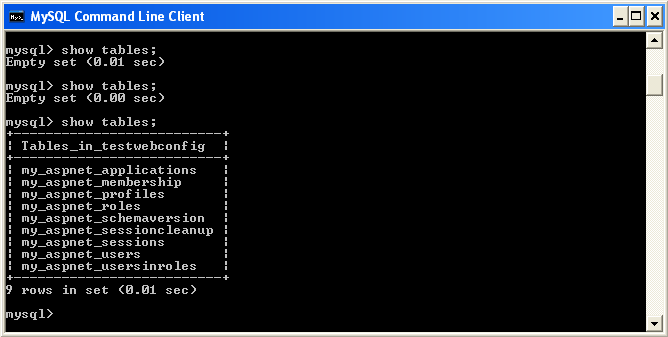
At this point it is necessary to select the Authentication Type to From Internet. This can be done by launching the ASP.NET Configuration Tool, and selecting the Security tab. Click the Select authentication type link and ensure that the From the internet radio button is selected. You can now examine the database you created to store membership information. All the necessary tables will have been created for you:
