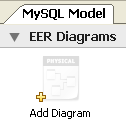
On the MySQL Model page, double-click the
Add Diagram icon. This creates and opens a
new EER Diagram.
From an EER diagram page you can graphically design a database.
The tools in the vertical toolbar on the left of the
EER Diagram tab are used for designing an
EER diagram. Start by creating a table using the table tool. The
table tool is the rectangular grid in the middle of the vertical
toolbar. Mousing over it shows the message, Place a New
Table (T).
Clicking this tool changes the mouse pointer to a hand with a
rectangular grid. Create a table on the canvas by clicking
anywhere on the EER Diagram grid.
Right-click the table and choose from the pop-up menu. This opens the table editor, docked at the bottom of the application.
The table name defaults to table1. Change the
name by entering invoice into the
Name: text box. Notice that the name of the
tab in the table editor and the name of the table on the canvas,
both change to this new value.
Pressing Tab or Enter while
the cursor is in the table name text box, selects the
Columns tab of the table editor and creates
a default column named, idinvoice.
Pressing Tab or Enter again
sets the focus on the Datatype drop-down list
box with INT selected. Notice that a field
has been added to the table on the EER canvas.
Pressing Tab yet again and the focus shifts to
adding a second column. Add a Description and
a Customer_id column. When you are finished,
close the table editor, by clicking the
button on the top left of the table editor.
Select the table tool again and place another table on the
canvas. Name this table invoice_item. Next
click the 1:n Non-Identifying Relationship
tool.
First click the invoice_item table; notice
that a red border indicates that this table is selected. Next
click the invoice table. Doing this creates a
foreign key in the invoice_item table, the
table on the “many” side of the relationship. This
relationship between the two tables is shown graphically in
crow's foot notation.
Revert to the default mouse pointer by clicking the arrow at the
top of the vertical toolbar. Click on the
invoice_item table and select the
Foreign keys tab.
Click the Foreign key Name text box. The referenced table should show in the Referenced Table column and the appropriate column in the Referenced Column column.
To delete the relationship between two tables, click the line joining the tables and then press Ctrl Delete.
Experiment with the other tools on the vertical toolbar. Delete a relationship by selecting the eraser tool and clicking the line joining two tables. Create a view, add a text object, or add a layer.
Save your changes to a MySQL Workbench Models
file (MWB) by choosing from the
menu or by using the keyboard command
Ctrl S.
