It is possible to forward engineer a database using an SQL script or by connecting to a live database.
To create a script of your database model use the
option found under the
menu. You may export a script to alter an
existing database or create a new database. The script to create a
database is similar to the one created using the
mysqldump db_name
command.
If you choose to create a database, there are a number of export options that you may choose from.
Selecting , , will start the Forward Engineer SQL Script wizard. The first page of the wizard is:
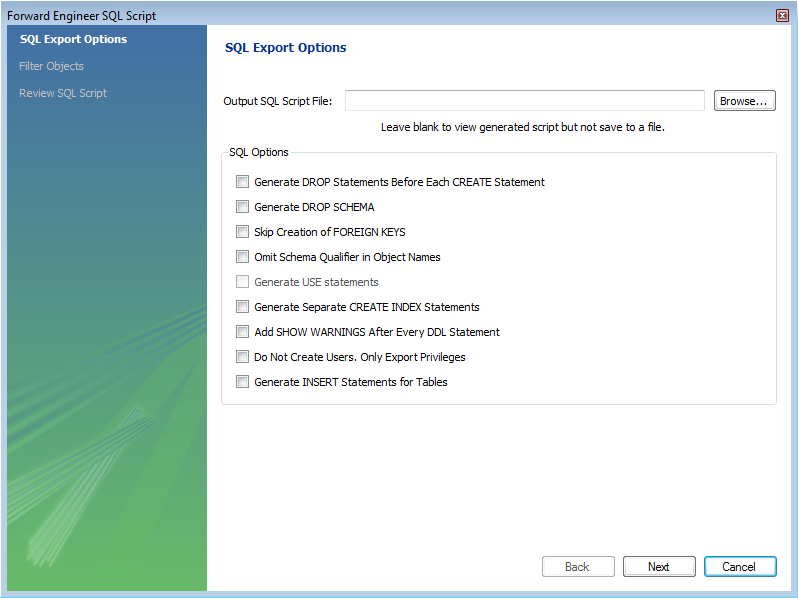
The SQL Export Options displays the following facilities:
Output SQL Script File
You can enter the name of your output file by entering it into the Output SQL Script File text box, or by using the button to select a file. If this text box is left blank you will be able to view the generated script, but it will not be saved to a file.
Generate DROP Statements Before Each CREATE Statement
Omit Schema Qualifier in Object Names
Generate Separate CREATE INDEX Statements
Choosing this option creates separate statements for index
creation instead of creating indexes as part of a
CREATE TABLE statement.
Add SHOW WARNINGS after every DDL statement
Do Not Create Users. Only Export Privileges
To update the privileges of existing users as opposed to
creating new users, select this check box. Exporting privileges
for nonexistent users will result in errors when you execute the
CREATE script. Exporting users that already
exist, will also result in an error.
Generate INSERT Statements for Tables
If you have added any records to a table using the Insert tab of the MySQL Table Editor, choose this option. For more information about inserting records see Section 16.6.7.1.3.9, “The Inserts Tab”.
Clicking takes you to the SQL Object Export Filter page where you can select the objects you wish to export.
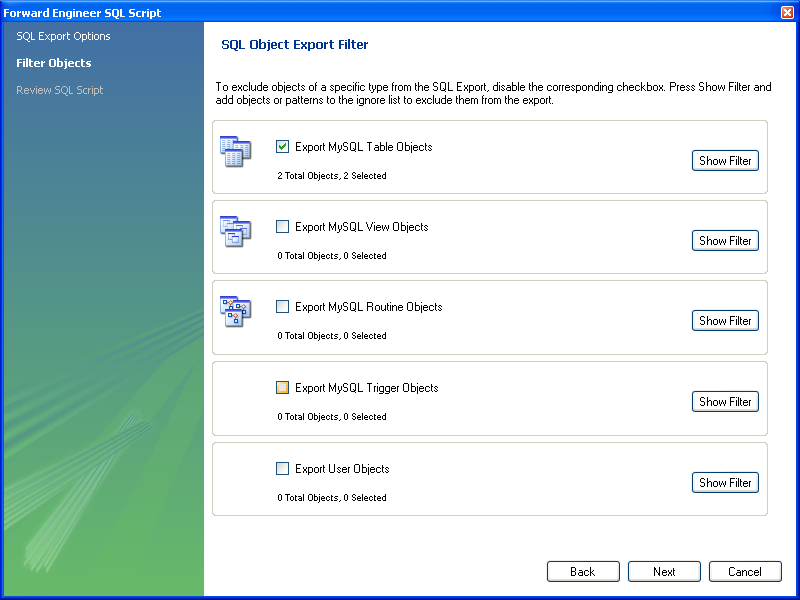
Precise control over the objects to be exported can be fine tuned by clicking the button. Once the objects to be exported have been selected it is possible to reduce the expanded panel by clicking the same button, now labelled .
Having selected the objects you wish to export you can click the button to review the script that has been generated:
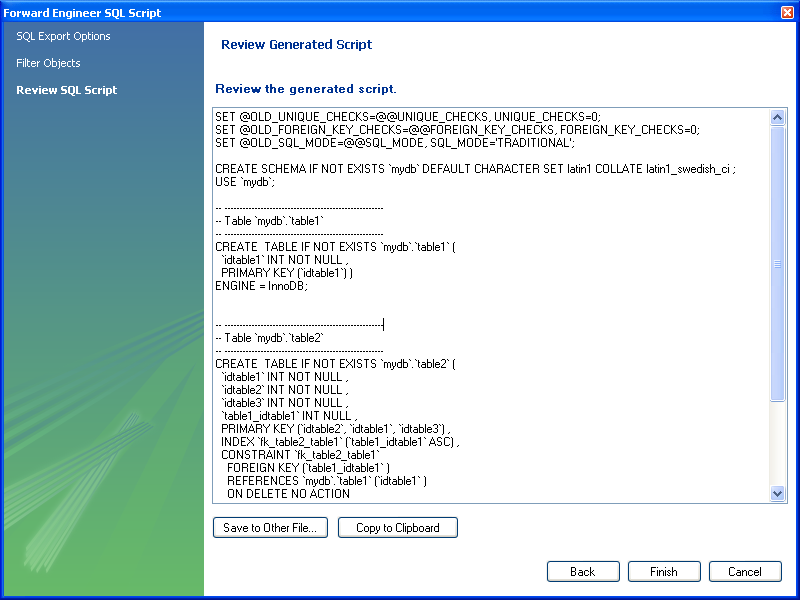
The button saves the script file and exits. You may return to the previous screen using the button.
You can then use the saved script to create a database.
The menu option for altering a schema, , is used for updating a database that has been redesigned within MySQL Workbench. Typically, this option is used when the SQL script of a database has been imported into MySQL Workbench and changed, and then you want to create a script that can be run against a database to alter it to reflect the adjusted model. For instructions on importing a DDL script see Section 16.6.7.9.1, “Reverse Engineering Using a Create Script”.
Select , , to start the Foward Engineer an ALTER Script wizard. You will be presented with the first page:
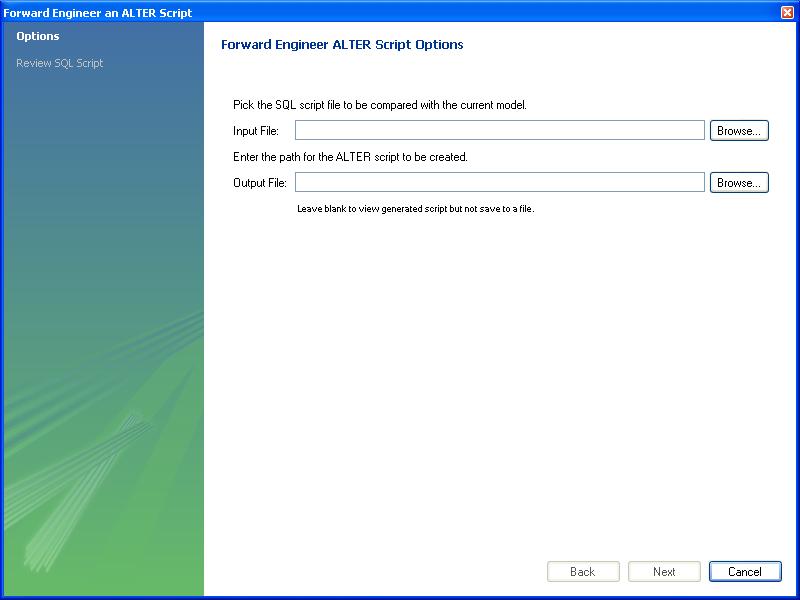
This first screen enables you to select a SQL script and compare it with the model currently in MySQL Workbench. The difference between the two models will be used to create an alter script that can be used to modify the target schema so that it matches the model held in MySQL Workbench. You can also simply view the script generated, rather than saving it to a file, by leaving the Output File text box empty.
The script selected as the Input File must use full schema
qualifiers, such as schema_name.table_name,
otherwise MySQL Workbench will not be able to generate a useable
alter script.
Pressing brings you to the Review SQL Script screen.
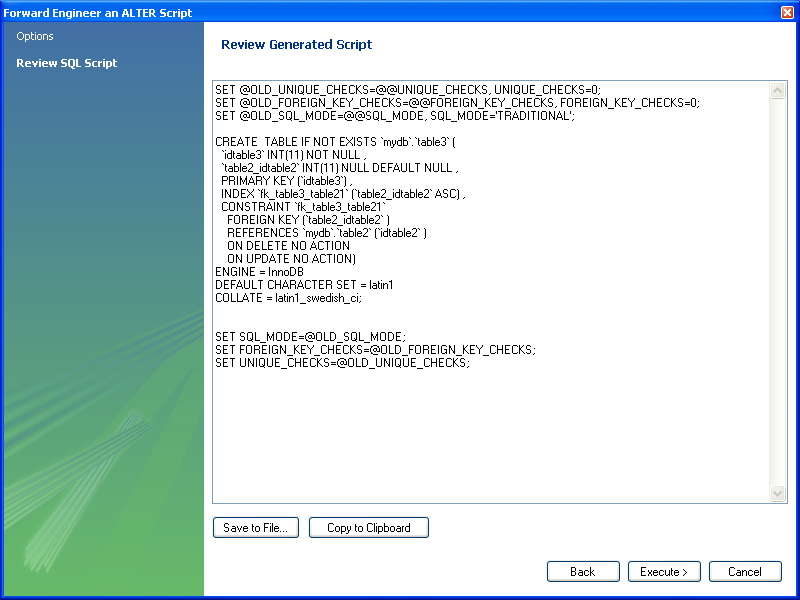
Here you can review and change the alter script that will be
generated. Make any changes you wish and, if you are happy with
the changes, save the ALTER script to file
using the button. You
can also click the button to
write the script to the previously specified output file.
The generated script can then be used to update the database.
Use forward engineering to export your schema design to a MySQL server.
Select the schema that you wish to forward engineer and then choose , option from the main menu.
The first page to be displayed is Catalog Validation (validation is only available in the Standard Edition):
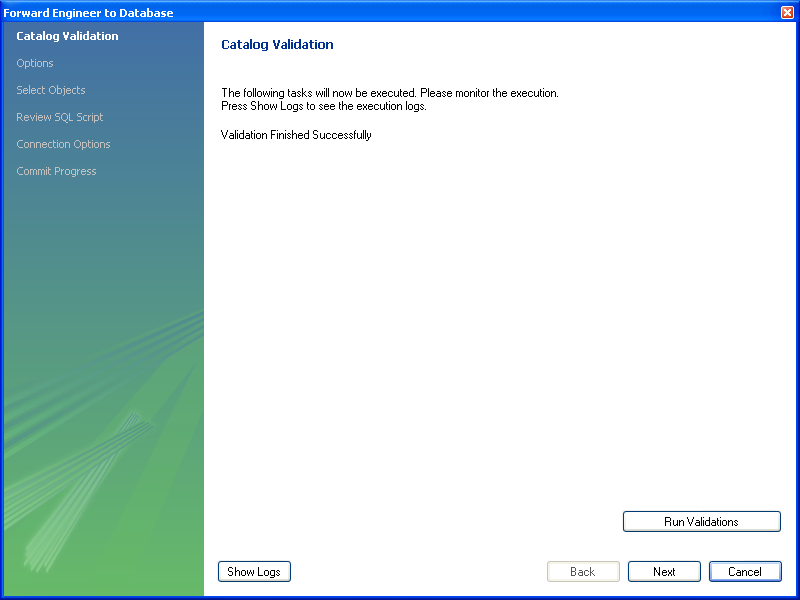
Click to validate the catalog.
Click the to continue.
The next page enables you to set options for the database to be created. These options are as described in Section 16.6.7.10.1.1, “Creating a Schema”:
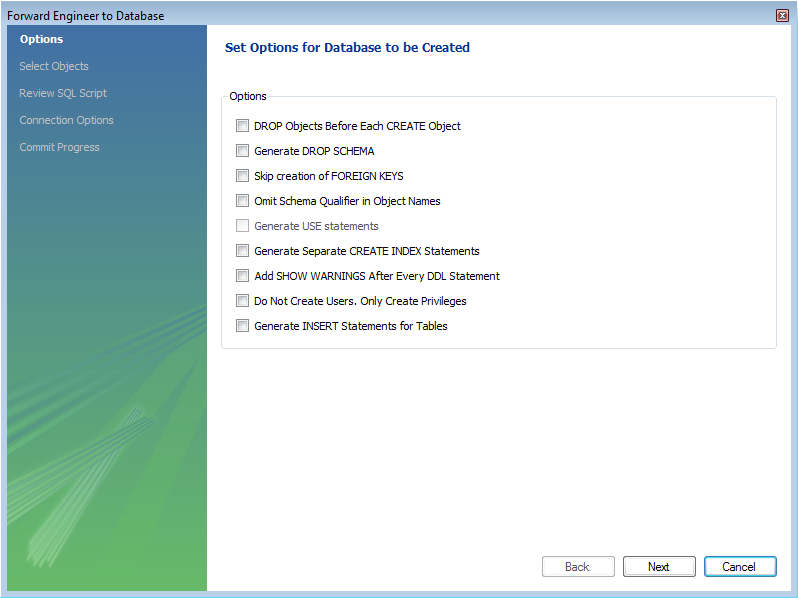
Select the required options and then click .
The next page enables you to select the objects to forward engineer:
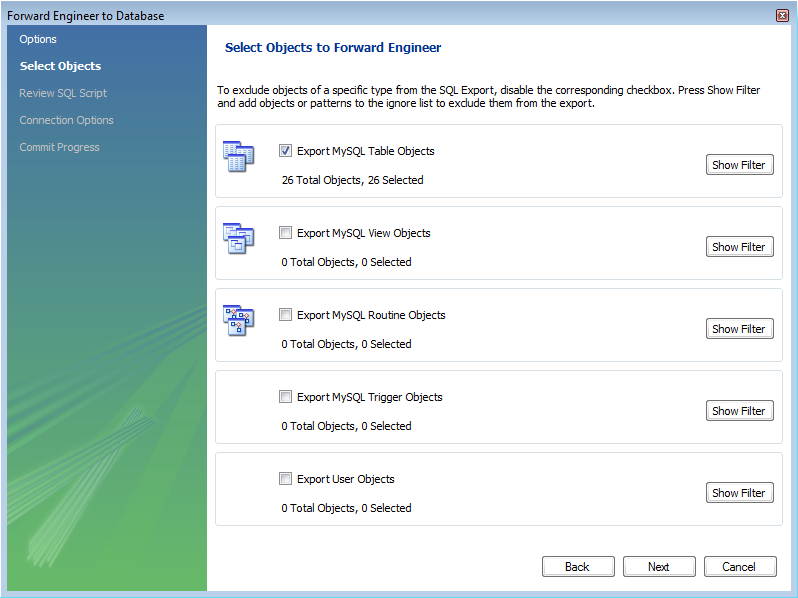
To select a subset of objects to forward engineer use the / button, and then select specific objects. Once you have selected your objects click to continue
On the Review Script page you may review and
edit the SQL script that will be executed:
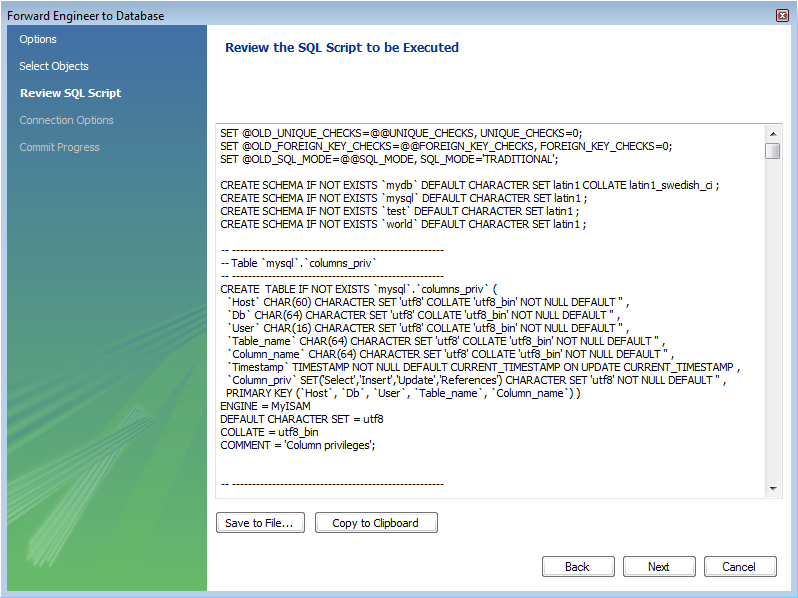
Click to continue if you are satisfied with the generated script.
The next step of the process is to connect to a MySQL server in order to create the new database schema. This page enables you to use a previously stored connection, or enter the connection parameters:
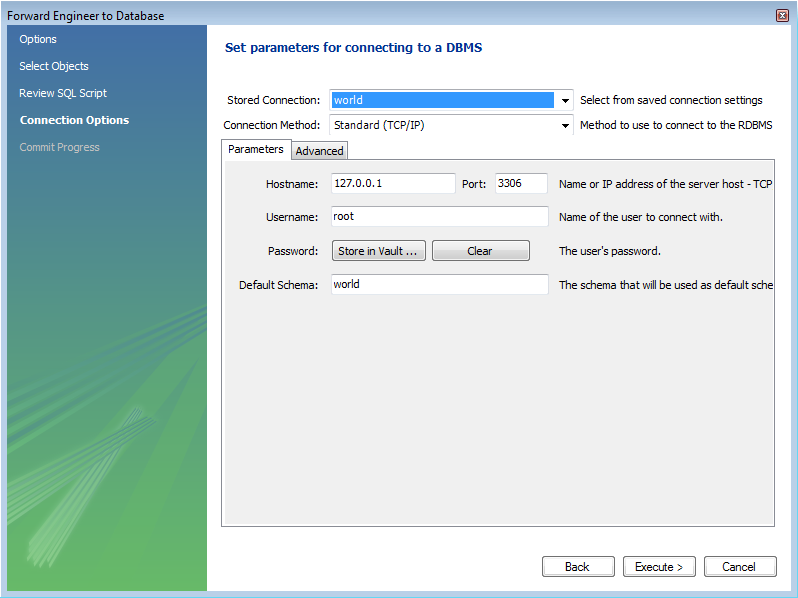
Once the connection parameters have been set click . The next page of the wizard displays the results of the forward engineering process:
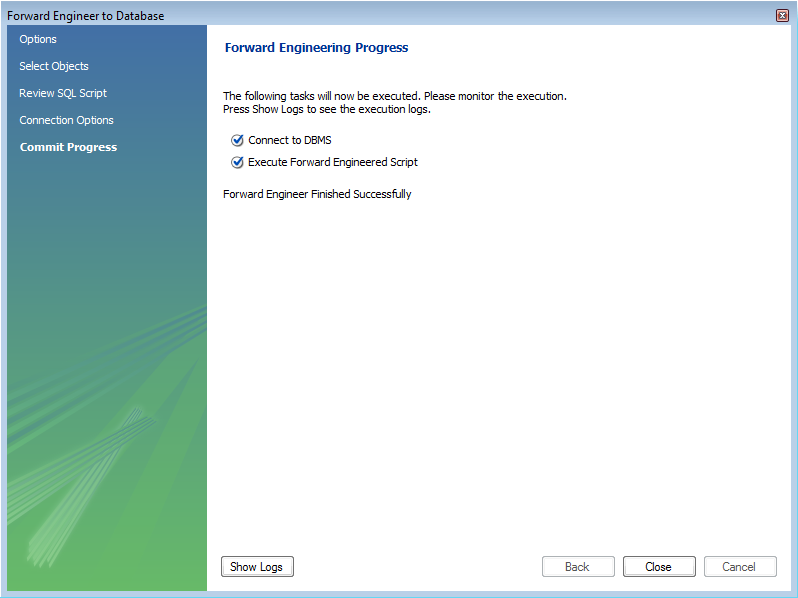
You can confirm the creation of the schema by connecting to the
target MySQL server and issuing the SHOW
DATABASES; command.
It is possible to synchronize a model in MySQL Workbench with a live database. By default, the synchronization process will change the live database to be the same as the model, but this is configurable during the synchronization process.
MySQL Workbench enables control over the direction of synchronization, and the objects synchronized, in a completely flexible way. You can choose to synchronize only certain tables, allow synchronization to the live database only, allow synchronization from the live database to the model only, or a combination of directions. In effect you have complete control as to whether the synchronization is unidirectional or bidirectional, and which objects exactly are subject to synchronization. This is all controlled in the Select Changes to Apply page of the synchronization wizard:
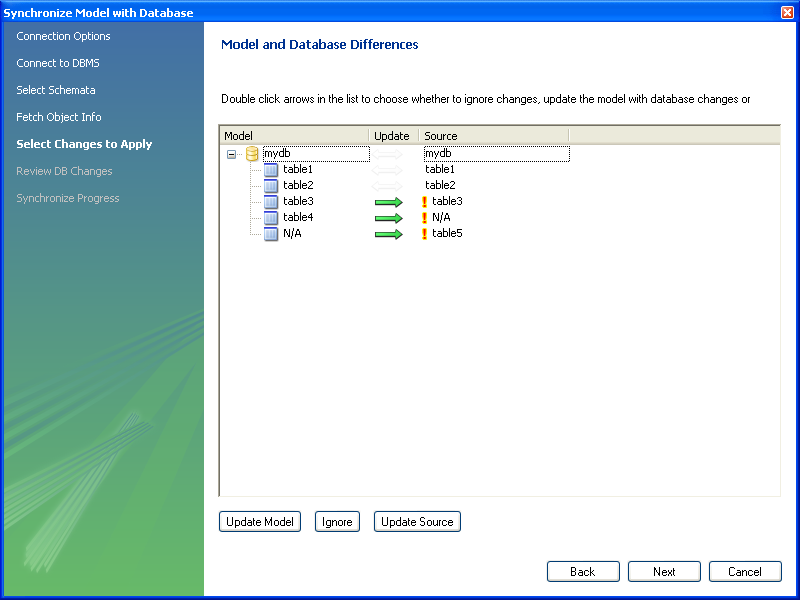
In the above example the live database consists of
table1, table2 and
table3. In MySQL Workbench an additional table,
table4, has been created, along with a
relationship between it and table3. Further,
table5 exists in the live database, but not in
the model. The actions that are configured to occur would result
in table3 being altered (to include the
relationship with table4),
table4 being created and
table5 being dropped, in the live database. It
is possible to reconfigure this though.
The next example shows how the direction of synchronization can be changed:
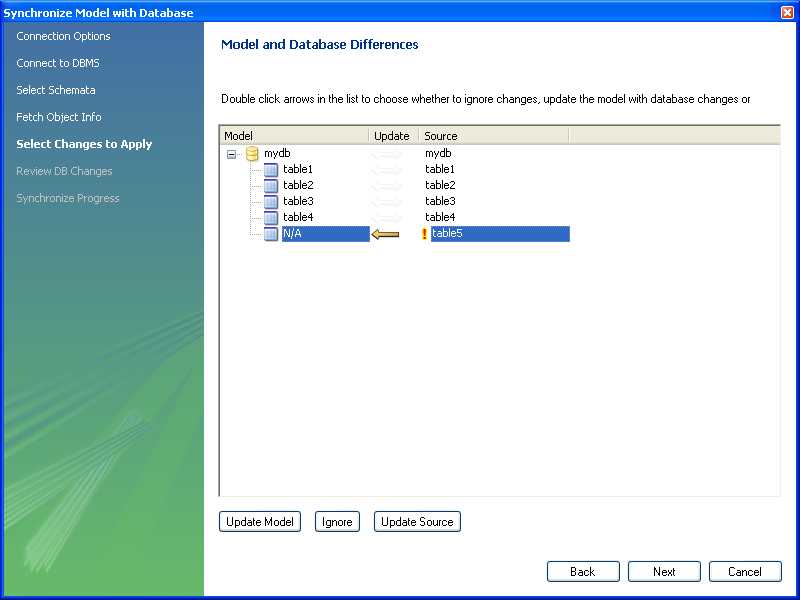
In this case the synchronization direction has been changed so
that rather than the default action of table5
being dropped from the live database, it will be incorporated into
the MySQL Workbench model.
For convenience the wizard provides three additional buttons to allows synchronization directions to be applied to a group of selected changes. The button causes the selected changes to only be applied to the model itself:

In the above example table7 would be added to
the model.
The button causes the selected changes to be ignored, no synchronization will take place for those changes:
In the above example no changes would take place.
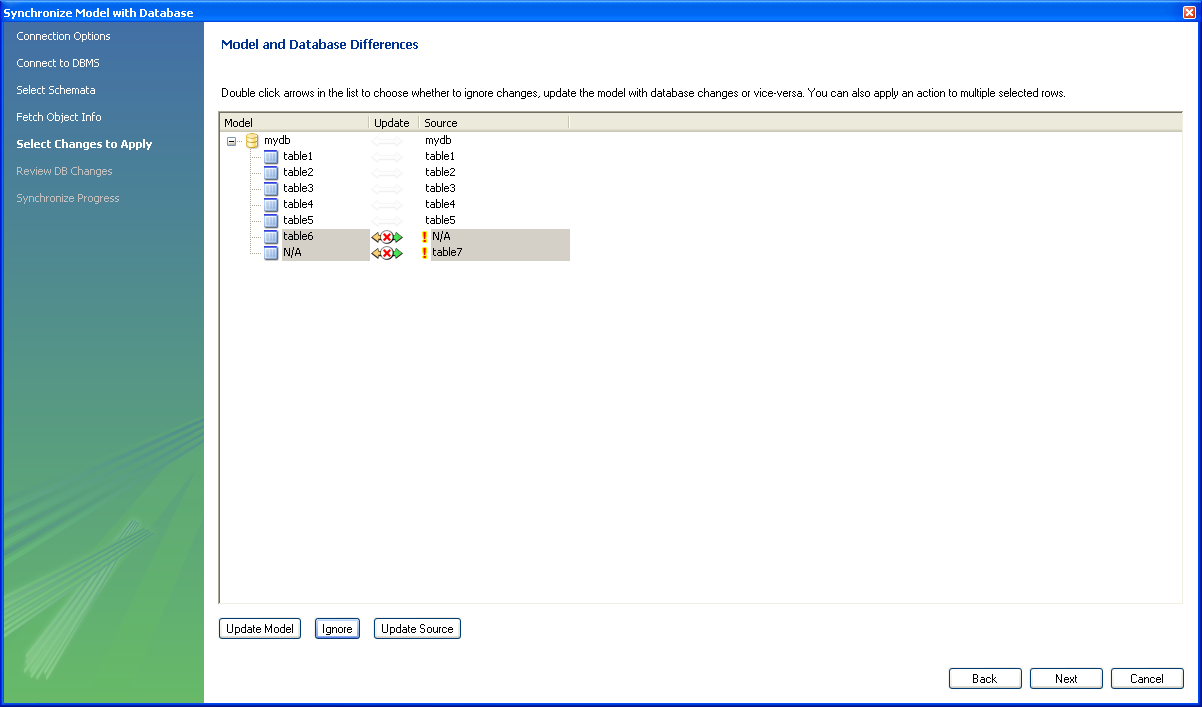
The button causes the selected changes to only update the live database:
In this example table6 would be added to the
live database and table7 would be dropped from
the live database.
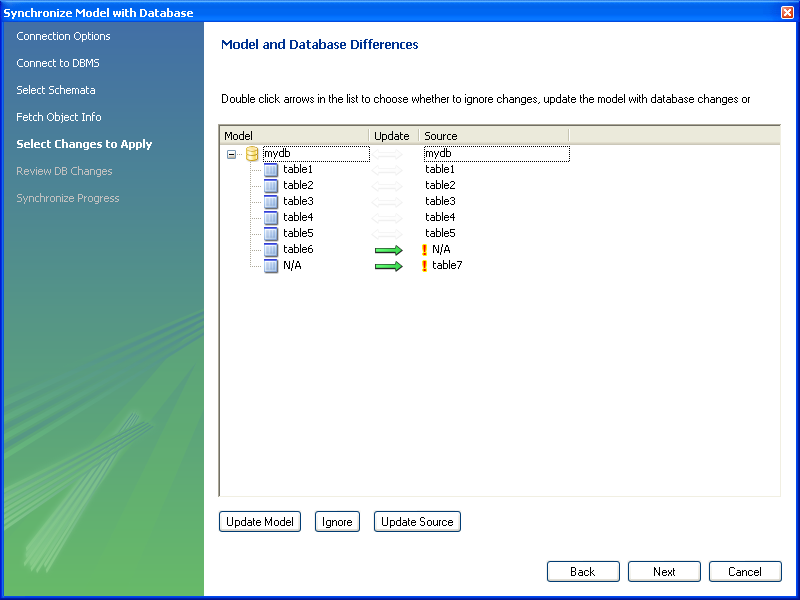
It is also possible to control individual changes by clicking the arrows. Clicking an arrow causes it to change between the three available synchronization directions:
In the above example table6 will be created in
the live database, and table7 will be created
in the model.
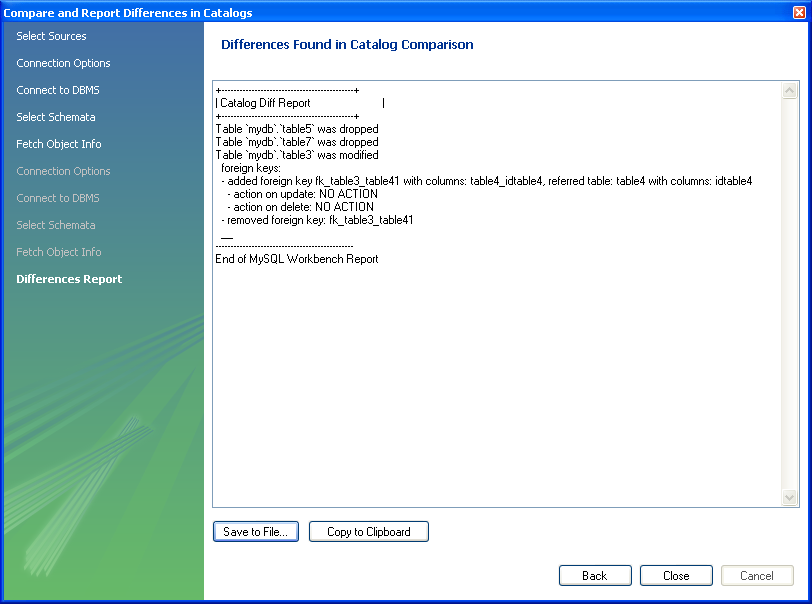
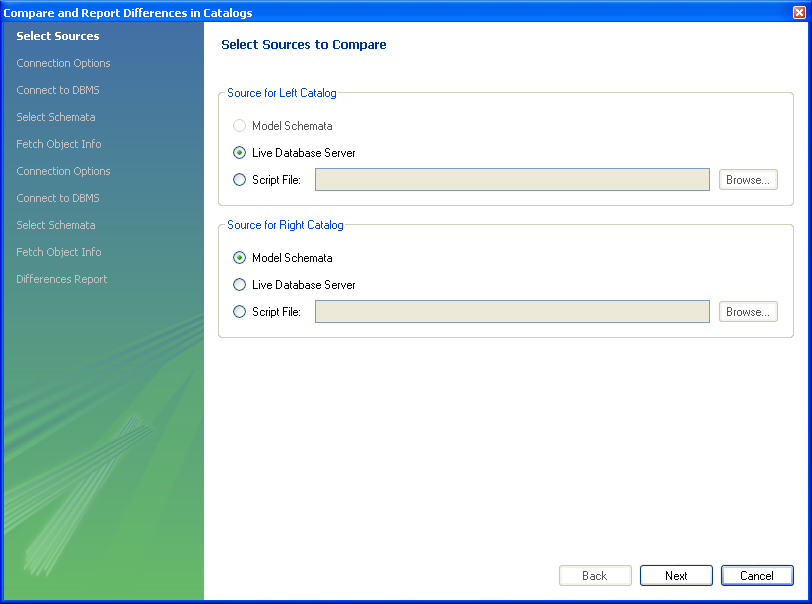
This facility enables you to create a report detailing the differences between your MySQL Workbench model, and a live database or script. Select , from the main menu to run the Compare and Report Differences in Catalogs wizard.
Having started the wizard the first step is to specify the catalogs you wish to compare. For example, you may simply wish to compare your live database against your current MySQL Workbench model:
You then proceed through the wizard, providing connection information if accessing a live database. The wizard will then produce a catalog diff report showing the differences between the compared catalogs: