In the previous section you created a model, schema, and table. You also forward engineered your model to the live server. In this section you will see how you can use MySQL Workbench to add data into your database on the live server.
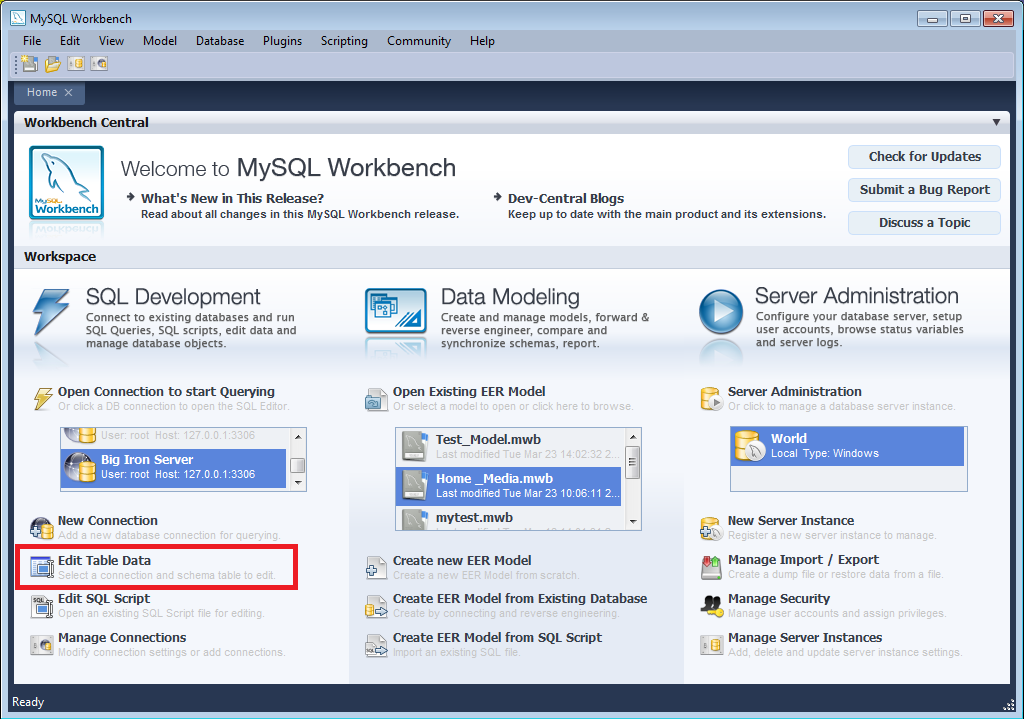
On the Home screen click the link Edit Table Data in the SQL Development area of the Workspace. This launches Edit Table Data wizard.
In the wizard select the “Big Iron Server” connection from the stored connection drop down listbox. Click .
Select the schema,
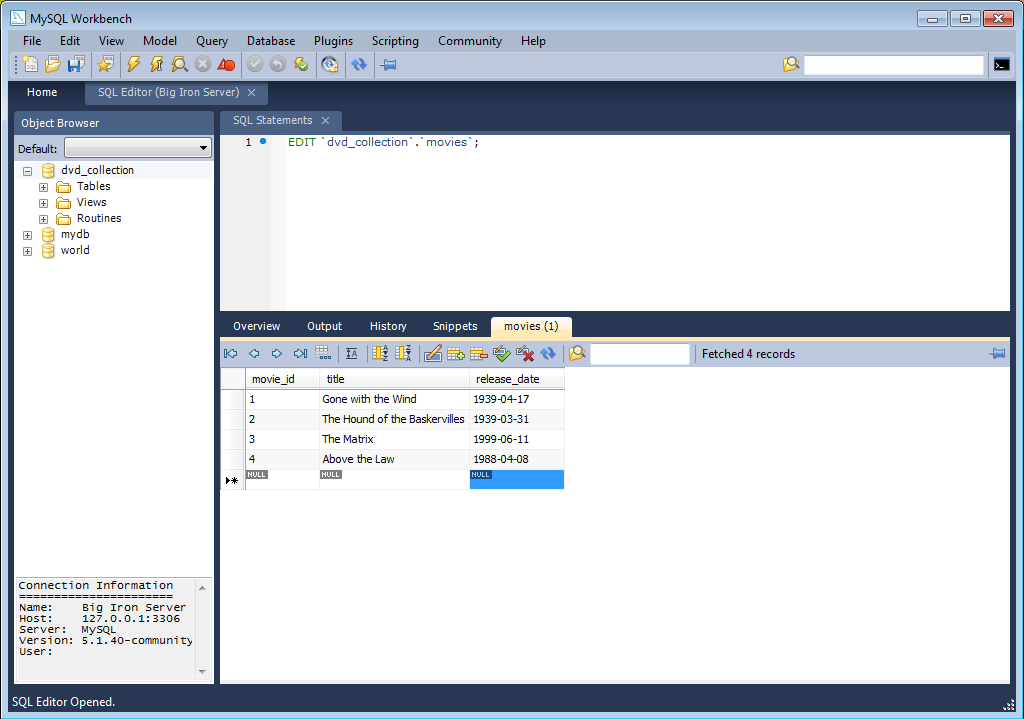
dvd_collection. Select the table to edit,movies. Click .You will see a data grid. This is where you can enter the data for your database. Remember that the
movie_idwas set to be autoincrement, so you do not need to enter values directly for this column. In the data grid enter the following movie information:title release_date Gone with the Wind 1939-04-17 The Hound of the Baskervilles 1939-03-31 The Matrix 1999-06-11 Above the Law 1988-04-08 Note: do not modify any values in the
movie_idcolumn.Now click the button in the toolbar located in the bottom right corner. A list of SQL statements will be displayed. Confirm that you understand the operations to be carried out. Click to apply these changes to the live server.
Confirm that the script was executed correctly and then click .
View the data grid again and observe that the autoincrement values have been generated.
Now you will check that the data really has been applied to the live server. Launch the MySQL Command Line Client. Enter
SELECT * FROM movies;to see the data just entered.You can also carry out a similar check from within MySQL Workbench. Click on the Home screen tab.
Click the link Open Connection to start Querying in the SQL Development section of the Workspace. This will launch the Connect to Database dialog. Select “Big Iron Server” from the drop down listbox. Click .
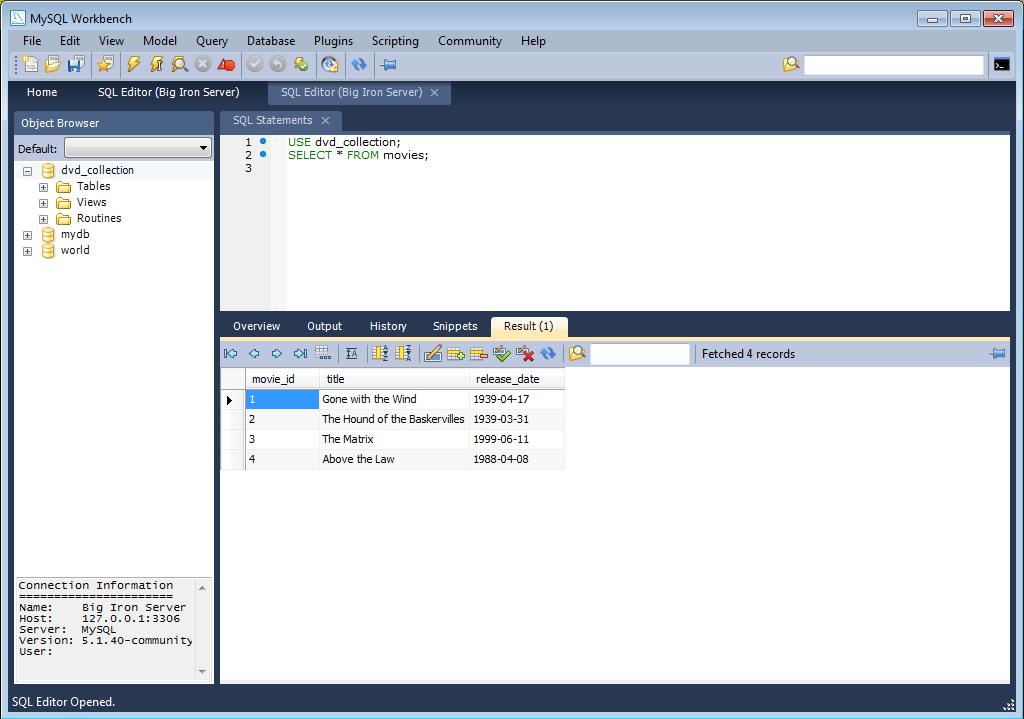
A new SQL Editor tab will be displayed. In the SQL Statements area enter the following code:
USE dvd_collection;
SELECT * FROM movies;
Now click the toolbar button. This resembles a small lightning bolt. The SQL Editor will display a new Result tab contain the result of executing the SQL statements.
In this section of the tutorial you have learnt how to add data to your database, and also how to execute SQL statements using MySQL Workbench.