You can add layers to a database only from an EER Diagram. Layers are used to help organize objects on the canvas. Typically, related objects are added to the same layer; for example, you may choose to add all your views to one layer.
Layers are added to an EER Diagram using the
Layer tool on the vertical toolbar. To do this
select an EER Diagram tab and right-click the
layer icon on the vertical toolbar. The layer icon is the
rectangle with an ‘L’ in the lower
left corner and it is found below the eraser icon.
Clicking the mouse on this icon changes the mouse pointer to a layer pointer. You can also change the mouse pointer to a layer pointer by pressing the L key.
Choosing the Layer tool changes the contents of
the toolbar that appears immediately below the menu bar. When the
Layers pointer is active, this toolbar contains
a drop down color chart. Use this list box to select the color
accent for the new layer. The color of your layer can easily be
changed later using the Properties palette.
Create a layer by clicking anywhere on the EER Diagram canvas and,
holding the left mouse button down, draw a rectangle of a suitable
size. This creates a new layer with the default name
layer1. To revert to the default mouse pointer,
click the arrow icon at the top of the vertical toolbar.
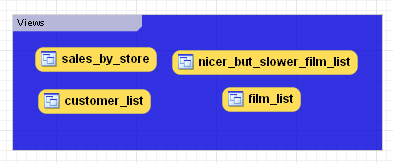
Find below an image of a layer containing a number of views:
Use the name property of the
Properties palette to change the name of a
layer.
Right-clicking a layer opens a pop-up menu with the following options:
The cut and copy options are useful for copying layers between different schemata.
Since layers are not schema objects, no confirmation dialog box opens when you delete a layer regardless of how you have configured MySQL Workbench. Deleting a layer does not delete schema objects from the catalog.
Add an object to a layer by dragging and dropping it directly
from the Catalog palette onto a layer. If you
pick up an object from an EER diagram you need to press
Ctrl as you drag it on to the layer, otherwise
it will not be "locked" inside the layer.
Locking objects to a layer prevents their accidental removal. You cannot remove them simply by clicking and dragging; in order to remove an object, you also need to press the Ctrl key while dragging it.
As a visual cue that the object is being "locked", the outline of the layer is highlighted as the object is dragged over it.
If you drag a layer over a table object, the table object will automatically be added to the layer. This also works for multiple table objects.
Note that layers cannot be nested, that is, a layer cannot contain another layer object.
When you select a layer on the EER Diagram canvas, its properties
are displayed in the Properties palette. The
properties accessible from the Properties
palette apply to the appearance of a layer on the EER Diagram
canvas.
In some circumstances you may want to make a layer invisible. To
do this, select the layer and, in the
Properties palette, set the
visible property to False.
To locate an invisible object, open the Layers
palette and select the object by double-clicking it. Once an
object is selected you can reset the visible
property from the Properties palette.
For a list of the properties accessible through the
Properties palette see
Section 16.6.5.11, “The Properties Palette”. In addition to the
properties listed there, a layer also has a
description property. Use this property to
document the purpose of the layer.