The MSI package is designed to install and configure MySQL in such a way that you can immediately get started using MySQL.
The MySQL Installation Wizard and MySQL Configuration Wizard are available in the Essentials and Complete install packages. They are recommended for most standard MySQL installations. Exceptions include users who need to install multiple instances of MySQL on a single server host and advanced users who want complete control of server configuration.
For information on installing using the GUI MSI installer process, see Section 2.3.3.1, “Using the MySQL Installation Wizard”.
For information on installing using the command line using the MSI package, see Section 2.3.3.2, “Automating MySQL Installation on Microsoft Windows using the MSI Package”.
If you have previously installed MySQL using the MSI package and want to remove MySQL, see Section 2.3.3.3, “Removing MySQL When Installed from the MSI Package”.
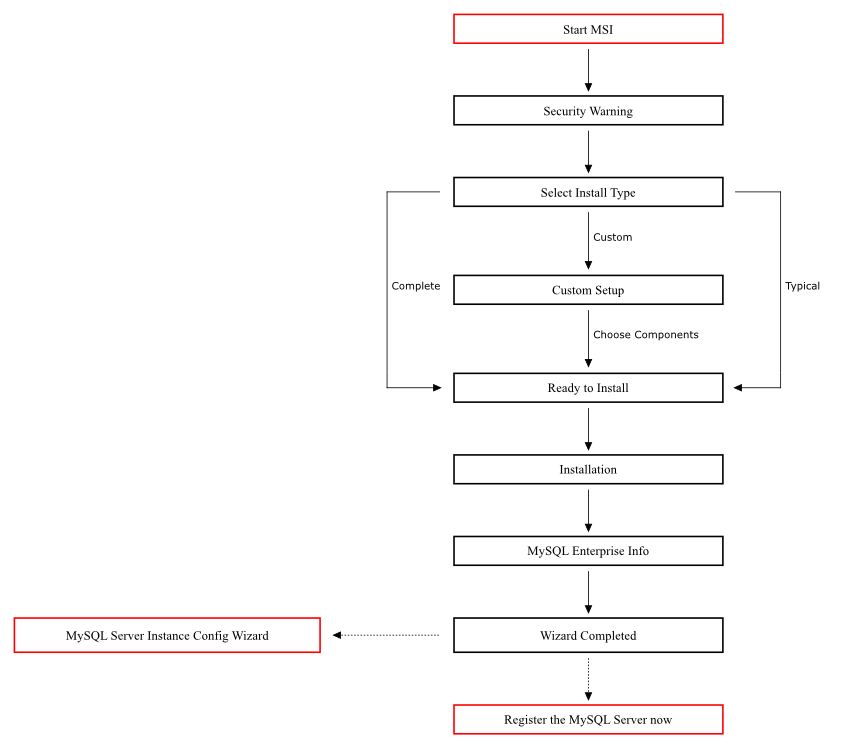
The workflow sequence for using the installer is shown in the figure below:
Microsoft Windows XP and later include a firewall which specifically blocks ports. If you plan on using MySQL through a network port then you should open and create an exception for this port before performing the installation. To check and if necessary add an exception to the firewall settings:
First ensure that you are logged in as an Administrator or a user with Administrator privileges.
Go to the Control Panel, and double click the Windows Firewall icon.
Choose the Allow a program through Windows Firewall option and click the button.
Enter
MySQLinto the Name text box and3306(or the port of your choice) into the Port number text box.Also ensure that the TCP protocol radio button is selected.
If you wish, you can also limit access to the MySQL server by choosing the Change scope button.
Confirm your choices by clicking the button.
Additionally, when running the MySQL Installation Wizard on Windows Vista, ensure that you are logged in as a user with administrative rights.
When using Windows Vista, you may want to disable User Account Control (UAC) before performing the installation. If you do not do so, then MySQL may be identified as a security risk, which will mean that you need to enable MySQL. You can disable the security checking by following these instructions:
Open Control Panel.
Under the User Accounts and Family Safety, select Add or remove user accounts.
Click the Got to the main User Accounts page link.
Click on Turn User Account Control on or off. You may be prompted to provide permission to change this setting. Click .
Deselect or unceck the checkbox next to Use User Account Control (UAC) to help protect your computer. Click to save the setting.
You will need to restart to complete the process. Click to reboot the machine and apply the changes. You can then follow the instructions below for installing Windows.