The Global Settings control the main configuration parameters for the entire MySQL Enterprise Monitor system, including your email notifications, data purge, and Enterprise website credentials.
The Global Settings tab is divided into these sections:
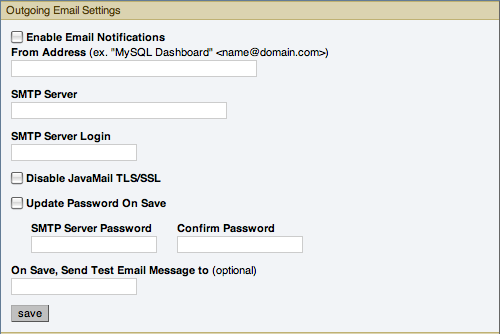
Configures the settings for email notifications by MySQL Enterprise Service Manager. Configure the From Address SMTP Server settings. If your server requires authorization, complete the necessary server login details, and whether SSL is required.
Alert notification via email is a key component of the MySQL Enterprise Monitor Advisor solution. For this reason you may want to immediately configure an SMTP account for at least one recipient.
To do this, choose the Settings tab and go to the
Global Settingsscreen by clicking the appropriate link. Here you configure the email settings that apply to the currently logged-in user.Find the
Outgoing Email Settingson the left of this page.Ensure that the
Enable Email Notificationscheckbox is checked and enter information as appropriate.The default value for the SMTP port is
25. If your mail server runs on a different port, specify the port, separated from the server name by a colon. For example, if your mail server runs on port 587, enteremail.myserver.com:587NoteAn email server must be available for sending email alerts.
The SMTP client uses Transport Layer Security (TLS) if the SMTP server supports it.
If your SMTP server incorrectly indicates that it supports TLS, check the Disable JavaMail TLS/SSL check box.
To test your configuration immediately, add an email address to the On Save, Send Test Email Message to box.
For more information about Outgoing Email Settings.
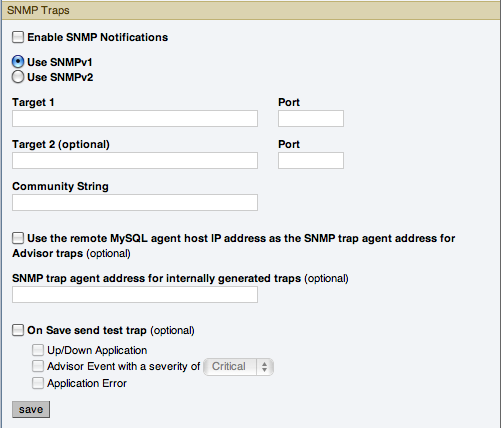
The SNMP Traps section of the Global Settings tab lets you enable Simple Network Management Protocol so that your Network Management System (NMS) can handle events created by the MySQL Enterprise Monitor. SNMP notifications are off by default. To enable them, click the Enable SNMP Notifications checkbox.
MySQL Enterprise Service Manager includes support for both SNMPv1 and SNMPv2. You can select the SNMP version to use by clicking the corresponding Use SNMPv1 or Use SNMPv2 radio button.
In the Target 1 or Target 2 text box enter the IP address or hostnames of your NMS listeners. The port number defaults to the well-known SNMP port,
162. If you are not using this port, enter the port that your Network Management System is listening on.Enter the appropriate community string in the
Community Stringtext box. The default value for this string ispublic.For the trap address for Advisor traps, you can optionally elect to use the address of the agent that triggered the alert, rather than the address of the MySQL Enterprise Service Manager. To do this, click the Use the remote MySQL agent host IP address as the SNMP trap agent address for Advisor traps. For internally generated SNMP traps (i.e. with MySQL Enterprise Service Manager) you can also specify an alternate address by putting the IP address in the SNMP trap agent address for internally generated traps box.
To ensure that the target you have specified is valid, check the
On Save, Send Test Trapcheck box. The remaining check boxes help you to configure how your NMS responds to MySQL Enterprise Monitor. Check the Up/Down Application check box to configure NMS for starting up or shutting down the MySQL Enterprise Monitor. For configuration of advisor events choose a level of severity and check the Advisor event with the severity ofCriticalcheck box. Finally, choose the Application Error check box to configure NMS to support application error traps. Be sure to save your settings before exiting.If you wish to enable SNMP traps globally, check the
Enable SNMP Notificationscheckbox. To enable SNMP traps only for specific rules run against specific servers or server groups leave this checkbox unchecked—enabling specific SNMP traps is done as rules are scheduled. For instructions on doing this see Section 15.10.2, “Scheduling Rules”.The Management Information Base (MIB) file associated with SNMP trapping is called
MONITOR.MIB. For the location this file see The Management Information Base (MIB) File.NoteThe MIB file supplied with MySQL Enterprise Service Manager is not directly compatible with OpenNMS. For a sample of the modifications that to make, see the comments for Bug#41714.
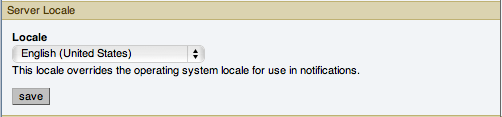
The
Server Localesetting determines the language of notification for the following items:Email notifications
SNMP traps
The naming conventions for shared resources such as a replication group name prefix
The initial value in this drop down list box is the locale for the OS on which the Dashboard is running.
Server Hostname
You can alter the hostname and port used to identify the MySQL Enterprise Service Manager when reporting notifications. This can be useful if the server hostname, and the hostname you want to use when connecting to your MySQL Enterprise Service Manager.
NoteOnly change the Port setting if you have altered or redirected the original port used when installing MySQL Enterprise Service Manager. Entering the incorrect information does not affect the accessibility of your system, except when clicking links within the notification messages.
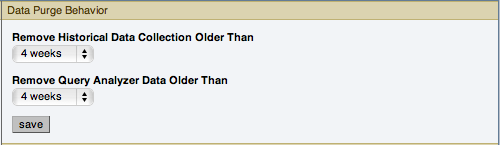
The Data Purge Behavior section of the Global Settings tab lets you remove old log files and also old data from the repository. The default purge interval is
28 days. If you wish to purge data, change this setting by choosing from the drop-down list. Choosing52 weeks, for example, removes all data that is older than a year.WarningPurging data permanently removes information from the repository. Since events are derived from data contained in the repository, they are purged along with the data.
Ensure that there is adequate disk space for the repository. If you are monitoring numerous servers and running many rules the size of the repository can increase rapidly. Choose purge behavior accordingly.
NoteThe purge process is started approximately once every minute. If you change the purge duration from a larger timespan to a smaller one, the data may start to be purged immediately.
You can configure the data purge behavior for a number of different systems individually:
Remove Historical Data Collection Older Than configures the duration that the main data about your servers is retained. This includes all data collections, including CPU, memory and connections and activity statistics.
Remove Query Analyzer Data Older Than configures the duration that the query analyzer statistics and information about individual queries is retained.
Notes for setting purge behavior:
Purging can be carried out manually by enabling the
innodb_file_per_tablefor the repository database and then using anOPTIMIZE TABLEoperation to reclaim space from deleted rows in the table.If you set the purge value to a very low timespan value when the previous setting was quite high, then the space used for the data that was purged is not reclaimed from the InnoDB tablespaces. You can do this by running
OPTIMIZE TABLEon the MySQL tables for MySQL Enterprise Service Manager to reclaim the space from the purged rows.You cannot set the Query Analyzer purge period to a value greater than historical data collection purge period. Attempting to do so produces a warning:
An
              invalid Query Analyzer data life span was given. Value may
              not be larger than data life span.
.
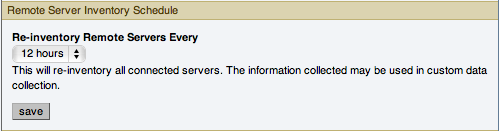
Remote Server Inventory Schedule
MySQL Enterprise Monitor keeps track of all the databases and tables in a server, as well as the amount of RAM, disk space, and other items. A re-inventory updates this information in case you have added or dropped databases and tables. Depending upon the configuration of your system, this operation can tax resources. If you are monitoring many remote servers this is an operation you may want to perform in off-peak hours only.
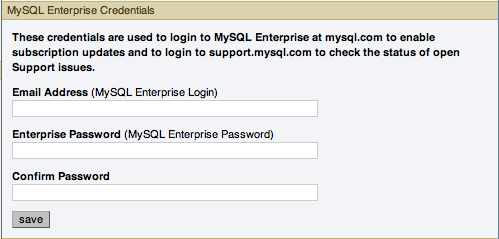
MySQL Enterprise
            Credentials
You can specify the credentials for logging into the MySQL Enterprise Website. These should match the user name and password that you have registered with MySQL for your enterprise subscription.
NoteOnly administrators can change the
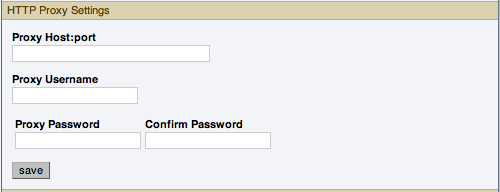
MySQL Enterprise Credentialssection; for other users, this section does not show up in the interface. For more information about different users and their rights see Section 15.8.4, “Managing Users”. Specifying incorrect credentials results in the error message, “Your credentials do not appear to be valid.”HTTP Proxy Settings
You may want to update your HTTP Proxy Settings if your MySQL Enterprise Service Manager is not directly connected to the internet. The proxy settings will be used when updating the information within the What's New tab. For more information, see Section 15.9, “The What's New Tab”.
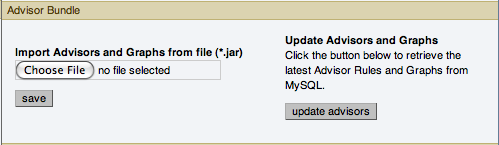
Advisor Bundle
You can update your Advisor Bundle and the associated rules and graphs by importing a new Advisor Bundle. To update your Advisor Bundle using a bundle file that you have previous downloaded:
Click and locate your Advisor Bundle on your computer.
Click to upload the updated bundle and validate the contents.
To update the Advisor Bundle automatically from the MySQL Enterprise Website using your existing MySQL Enterprise Credentials, click the button.
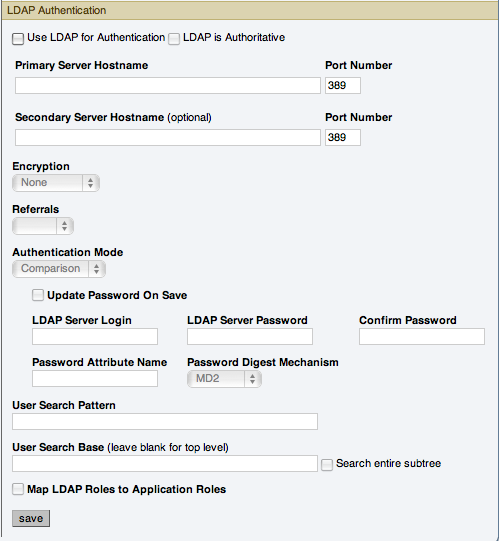
You can configure LDAP Authentication to be used for the users that are provided access to the MySQL Enterprise Dashboard. To use LDAP authentication it must have been enabled and configured within the settings.
The configurable elements for LDAP authentication are:
Use LDAP for Authentication
To enable LDAP authentication, click the Use LDAP for Authentication checkbox.
LDAP is Authoritative
If you want to make LDAP the authoritative (only) authentication mechanism, check the LDAP is Authoritative checkbox. Note that if you select this option and the LDAP service is misconfigured, you can lock yourself out of MySQL Enterprise Dashboard entirely.
Primary Server Hostname
Hostname or IP address of the primary LDAP directory server.
Port Number
Port number of the primary LDAP server. You must change this option to the port used for SSL connections if you have enabled encryption.
Secondary Server Hostname (optional)
Hostname or IP address of the secondary/failover LDAP directory server.
Port Number
Port number of the secondary/failover LDAP server. You must change this option to the port used for SSL connections if you have enabled encryption.
Encryption
Encryption type required for communication with the LDAP server(s). Supported options are
None,StartTLS, andSSL.Referrals
Authentication should follow any referrals provided by the server. The default is to use whatever the LDAP directory server is configured to do. If you are using Microsoft Windows Active Directory, you must set this option to
Follow.Authentication Mode
The authentication mode to use. Choices are
Bind
              as User
, which binds to the LDAP directory using the credentials given to login to MySQL Enterprise Service Manager.Comparisonrequires an LDAP login/password that can see the configured password attribute to make a comparison with the given credentials.User Search Pattern
Pattern specifying the LDAP search filter to use after substitution of the username, where
{0}marks where the username should be substituted for the DN.User Search Base (leave blank for top level)
The entry to use as the base of the subtree containing users. If not specified, the search base is the top-level context.
Search entire subtree
The search scope. Set to
trueif you wish to search the entire subtree rooted at the *User Search Base entry. The default value offalserequests a single-level search including only the top level.Map LDAP Roles to Application Roles
Specifies whether MySQL Enterprise Service Manager should use the roles defined in LDAP to map to MySQL Enterprise Monitor application roles. If enabled, and LDAP is not configured to be authoritative, if a user authenticates successfully via LDAP and has a valid mapped role, they are granted permissions to the application. Roles are mapped according to the entries in the Application Role/LDAP Role(s) fields, which take comma-separated lists of LDAP roles to map to the given MySQL Enterprise Monitor roles.
If you select this option, you are provided with additional fields that let you configure how roles are looked up within the LDAP server.
For more information on LDAP authentication and integration with Tomcat, see Tomcat Documentation.