On Mac OS X, there are three installation modes:
osx, text, and
unattended. For more information on this topic
see Section 15.6.4, “Unattended Installation”. The
text mode installation for Mac OS X is
identical to text installation under Unix. For
text mode installation instructions see
Section 15.6.2.2, “Installing the Service Manager on Unix and Linux”.
Installing the MySQL Enterprise Service Manager on Mac OS X requires an existing installation of Java. The minimum required version is 1.5.0_7. If this version is not installed on your machine you can download it from Apple. This version of Java requires Mac OS X version 10.4.5 as a minimum, so you may need to upgrade your operating system in order to install it.
For reasons of backwards compatibility, Mac OS X is usually
installed with multiple versions of Java. When installing in
osx mode, version 1.5.0_7 must be the default
version. Upon installation, Java 1.5.0_7 sets itself as the
default, so this is usually not a problem.
If you have changed the default Java version, you can reset it in
your environment, or you can install the MySQL Enterprise Service Manager in
text mode, setting the environment variables to
point to the correct version of Java. To install in
text mode, find the
installbuilder file in the
Contents/MacOS directory immediately below
the
mysqlmonitor-
directory. Installing the MySQL Enterprise Service Manager in
version-osx-installer.apptext mode is identical to the procedure
described in Section 15.6.2.2, “Installing the Service Manager on Unix and Linux” with the
minor differences noted above.
To install using the GUI (osx) installation,
follow these instructions:
Double-click the MySQL Monitor installer. In the Language Selection dialog, select the language to use for the installer and then click .
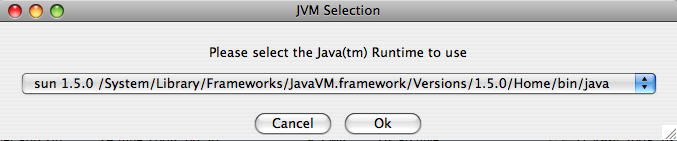
If you have multiple Java installations on your machine, choose which Java to use with your MySQL Enterprise Service Manager installation (1.5.0 or later is required), and click .
With the installation language and Java version selected, the remainder of the installation sets up the installation location and the main configuration parameters required by MySQL Enterprise Service Manager. Click to continue.
Select the installation directory where you want the MySQL Enterprise Service Manager components installed. By default on Mac OS X the directory is
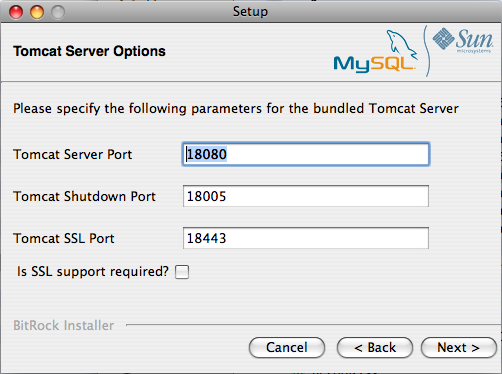
/Applications/mysql/enterprise/monitor. Click the button next to the installation directory field to select a directory using the File chooser, or type the directory manually. Click to continue.Configure the options that set the network ports used by the Tomcat server. For more information, see Section 15.6.2.1, “Service Manager Installation Common Parameters”. Click to continue.
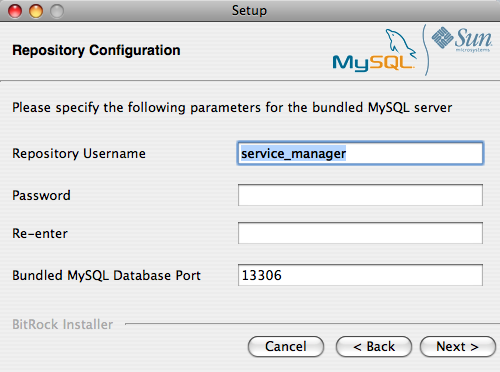
Configure the repository settings, setting the user name, password and port for the bundled MySQL server that stores the information and statistics for your installation. For more information, see Section 15.6.2.1, “Service Manager Installation Common Parameters”. Click to continue.
You receive information and a warning about the configuration options and how they are stored in the
configuration_report.txtfile, and its location. Record the full path to this file for future reference. Click to continue.Next, start the installation process. Click to continue.
Once the installation is completed, you receive information on how to uninstall MySQL Enterprise Service Manager. Click to continue.
To complete the installation and set up your MySQL Enterprise Service Manager, login to the Dashboard. You can do this automatically by leaving the box checked on the final window before clicking . To skip the Dashboard at this time, uncheck the box and click .
Your installation is now complete. To continue with the configuration of MySQL Enterprise Service Manager, see Section 15.6.2.7, “MySQL Enterprise Service Manager Configuration Settings and Advisor Installation”.