This section describes how to perform an update for the MySQL Enterprise Service Manager or the MySQL Enterprise Agent, when updates are available for these components.
Upgrade Restrictions
You cannot use the update installers to change to a different operating system or chip architecture. For example, you cannot update a 32-bit Linux installation to a 64-bit version using an update installer. Do a fresh installation instead.
You also cannot use the upgrader if you installed the MySQL server for the MySQL Enterprise Service Manager instance outside the MySQL Enterprise Service Manager installation directory.
The installation and configuration of MySQL Enterprise Agent must be standard before you start the installation. The update installer will not upgrade agents where you have changed or modified the filenames or directory layout of the installed agent, configuration files, or the startup files.
The upgrade installer overwrites
items-mysql-monitor.xml. On Windows, this
file is in the C:\Program
Files\MySQL\Enterprise\Agent\share\mysql-monitor-agent
directory and on Unix, in the
/opt/mysql/enterprise/agent/share/mysql-monitor-agent
directory. Back this file up if you have made any changes to it.
The Upgrade installer for MySQL Enterprise Service Manager overwrites any changes
you made to the my.cnf within your
MySQL Enterprise Service Manager installation. Copy the existing
my.cnf file before starting the upgrade
installer.
Version Considerations
The method you use for upgrading MySQL Enterprise Monitor components depends on the upgrade you are performing.
To upgrade between major versions (for example, from MySQL Enterprise Monitor 1.3 to merlin 2.0), start by shutting down the MySQL Enterprise Service Manager and each connected MySQL Enterprise Agent. First, update the MySQL Enterprise Service Manager, then update the MySQL Enterprise Agent on each monitored client.
To upgrade between the same major version, for example, MySQL Enterprise Monitor 2.0 to MySQL Enterprise Monitor 2.1, or a minor version, such as MySQL Enterprise Monitor 2.1.1 to MySQL Enterprise Monitor 2.1.2, you can shut down only the component (agent, or server) you are updating. Using this method, you can perform a 'rolling' upgrade, where you shut down a single MySQL Enterprise Agent, upgrade it to the latest agent version, and then restart the agent before moving on to the next monitored instance.
Running the Update Installer
The name of the update file varies, but it shows the target
operating system, the version the update applies to, and the
component name. (There are separate update installers for the
Service Manager and the Agent.) For example, a file named
mysqlenterprisemanager-2.2.0-windows-update-installer.exe
You install an update in the same way that you initially installed
the service manager or the agent; in win32 or
unattended mode on Windows; in
gtk, text,
xwindow, or unattended mode
on Unix; and in osx, text ,
or unattended mode on OS X.
Run the installation file and choose the directory of your current installation and whether or not you wish to back up your current installation. The time required to complete the process varies depending upon the nature of the update.
You can run an unattended upgrade, the same way you run an
unattended install. To see all the options you can specify during
the upgrade process, run the update installer with the
--help option.
Undoing an Upgrade
If you chose to back up your current installation, a directory
named backup is created in the current
installation directory. This directory contains copies of the
directory or directories that are replaced during the update. In
cases where only specific files are replaced, the
backup directory may contain only these
files. To undo the update, stop both the MySQL Enterprise Service Manager and
MySQL Enterprise Agent, then overwrite the new files or directories with
the originals found in the backup directory.
You can delete or archive this directory after you confirm that
the update was successful.
If you choose to back up your current installation, the installer checks that there is adequate disk space for your repository backup. If there is not enough space, you are given the option of choosing another location; you can also choose not to back up the repository.
Upgrading Advisors
To update your Advisors, see Section 15.6.2.7.3, “Installing, Updating or Upgrading Advisors After Initial Login”.
To upgrade your existing installation from MySQL Enterprise Monitor 1.3 to MySQL Enterprise Monitor 2.0 or higher, upgrade both the MySQL Enterprise Service Manager and the MySQL Enterprise Agent on each machine that you are monitoring.
To perform the update process, use an update
installer. This ensures that your current configuration
information is migrated to the new version of MySQL Enterprise Service Manager.
Before you start the migration, shut down your MySQL Enterprise Service Manager and MySQL Enterprise Agent on each monitored host. Then, install the updated MySQL Enterprise Service Manager application to migrate the configuration and data of the main application and repository. Once the new MySQL Enterprise Service Manager is running, you can start to update and migrate each agent.
For more information on upgrading your MySQL Enterprise Service Manager, see Section 15.6.6.1.1.1, “Upgrading to MySQL Enterprise Service Manager 2.x”. For more information on upgrading an MySQL Enterprise Agent, see Section 15.6.6.1.1.2, “Upgrading to MySQL Enterprise Agent 2.0”.
Upgrading MySQL Enterprise Service Manager from 1.x to 2.0 or higher requires one of the update installers. The update installer performs a number of operations during installation:
A new database, required to support 2.0 functionality, is created.
Your core dashboard, user, and rule information is migrated from the old database to the new database.
The core configuration parameters for the MySQL Enterprise Service Manager are migrated from MySQL Enterprise Monitor 1.3 are migrated to MySQL Enterprise Monitor 2.x.
The installation of the new software using the update installer follows this basic sequence:
Request the installation language.
Confirm the location of the current MySQL Enterprise Service Manager installation.
Specify whether you want to keep a copy of the old server, application, and database files.
Configure the Tomcat server settings, including whether the new server should support SSL connections from agents.
If requested, the application and database information is backed up and upgraded, before the new application is installed.
The installation process is consistent for all platforms. A sample of the process for Max OS X is provided below:
Double-click the update installer. The update installer has
updatein the file name, for example,mysqlmonitor-2.0.0.7101-osx-update-installer.app.Confirm the language to use when installing the software.
Click
An information screen shows the application you are installing. Click to continue.
Specify, or locate, the previous installation of MySQL Enterprise Service Manager. If you installed the server within the default location, the current version of the application is located automatically.
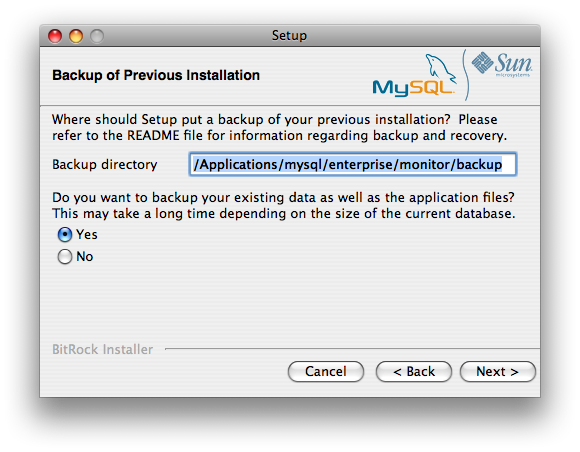
The installer can keep a backup copy of your existing application, including keeping a complete backup of the data stored within your MySQL Enterprise Monitor repository database.
Specify the location of the backup (default is to use the
backupdirectory within your installation directory). Note that backing up the database in addition to the main application increases the installation time, as the files are copied. The more data in your repository, the longer the installation process takes.Specify the Tomcat Server options. The Tomcat Server Port is the default port where you access the MySQL Enterprise Dashboard. If you want to support agents using SSL to communicate to MySQL Enterprise Service Manager, check the Is SSL support required?
Confirm that you want to continue the installation. Once installation has started, the backup of your existing application (and database) starts. This process may take some time. Wait until the process completes.
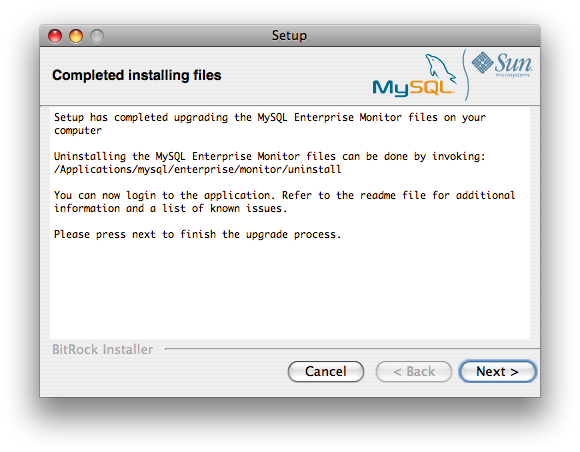
Once the process has completed, you receive a notification of the installation process, including how to uninstall the application if you want to do so in the future. If any errors occurred, they are reported here.
The installation has now completed. You can automatically start the MySQL Enterprise Service Manager and view the attached Readme file by ensuring the checkboxes on this page are selected.
You can now quit the installer.
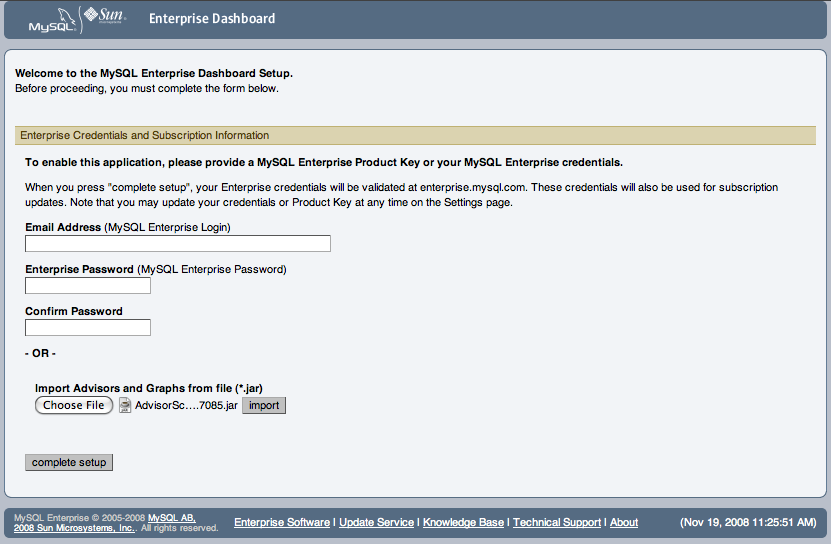
Once the installation is completed, the first time you login to MySQL Enterprise Dashboard, provide your login credentials, if they do not already exist in the server configuration, or provide a copy of the Advisor jar suitable for your MySQL Enterprise Service Manager version.
MySQL Enterprise Monitor is now updated. Update each of your agents to MySQL Enterprise Agent 2.x to ensure that they are providing the correct information to MySQL Enterprise Service Manager.
To upgrade an agent, use an update
installer, which migrates your configuration information while
it updates the application files.
The agent log file,
mysql-monitor-agent.log, if it exists,
is preserved during the upgrade. A new log file,
mysql-monitor-agent.log is used by
MySQL Enterprise Agent 2.0.
The core sequence is the same on all platforms. The following section shows the update process on Linux:
Start the update installer.
shell> ./mysqlmonitoragent-2.0.0.7101-linux-glibc2.3-x86-32bit-update-installer.bin
For MySQL Enterprise Agent 2.2 and higher, If you have multiple instances of MySQL Enterprise Agent installed, you can specify a unique name for the agent, which is used to identify the agent startup script (in
/etc/init.dand other configuration information. To specify the installation, use the--servicename=option.mysql-monitor-agentSet the language for the installation process.
Language Selection

Please select the installation language
[1] English
[2] Japanese
Please choose an option [1] :
Confirm or update the location of the installation directory of the previous version.
----------------------------------------------------------------------------
Welcome to the setup wizard for the MySQL Enterprise Monitor Agent Update

----------------------------------------------------------------------------
Please specify the directory that contains the previous installation of
the MySQL Enterprise Monitor Agent

Installation directory [/opt/mysql/enterprise/agent]:
Specify whether you want to create a backup of the current application and configuration information, and if so, where the backup directory should be created.
----------------------------------------------------------------------------
Current installation backup

Do you want to create a backup during the update process?

Backup the current installation [Y/n]: Y


Backup directory [/opt/mysql/enterprise/agent/patchbackup]:
Choose whether to enable the Query Analyzer. The Query Analyzer lets you monitor the execution statistics for individual queries executed through your MySQL servers. To enable it, specify the proxy port, MySQL server and MySQL server port that you want to use. If you do not enable Query Analyzer now, you can enable it later. See Section 15.13, “The Query Analyzer Tab”.
---------------------------------------------------------------------------- Query Analyzer Configuration MySQL Proxy enables query monitoring and analysis by listening on the port specified below for client connections that are then passed through to a backend MySQL database server. It is not needed for basic monitoring functionality, but is required for query monitoring and analysis. Visit the following URL for more information: https://enterprise.mysql.com/docs/monitor/2.0/en/mem-query-analyzer.html Enable Proxy (recommended) [Y/n]: Proxy Port [
6446]: Backend Host: 127.0.0.1 (cannot be changed) Backend Port: 3306 (cannot be changed)You are now ready to complete the installation. Confirm that you want to continue.
----------------------------------------------------------------------------
Setup is now ready to begin installing MySQL Enterprise Monitor Agent Update on your computer.

Do you want to continue? [Y/n]:

----------------------------------------------------------------------------
Please wait while Setup installs MySQL Enterprise Monitor Agent Update on your computer.

 Installing
 0% ______________ 50% ______________ 100%
 #########################################

----------------------------------------------------------------------------
Setup has finished installing MySQL Enterprise Monitor Agent Update on your computer.

Restart MySQL Enterprise Monitor Agent now [Y/n]:

View Readme File [Y/n]: n
Before connecting your MySQL Enterprise Agent to your MySQL server, update the grants for the MySQL Enterprise Agent. Connect to the MySQL server and run this statement to update the required grants:
GRANT CREATE, INSERT
  ON mysql.*
  TO  'mysqluser'@'localhost'
  IDENTIFIED BY 'agent_password';
In the preceding command, replace the
mysqluser and
agent_password parameters with the values
used for connecting your agent to your MySQL server.
Once the update agent has communicated with the MySQL Enterprise Service Manager, the core information about the agent and the MySQL server it is monitoring is migrated to the new data format required by MySQL Enterprise Service Manager 2.x. To migrate the existing stored data, see Section 15.15.6, “Migrating 1.3.x Historical Data to MySQL Enterprise Monitor 2.0”.
When upgrading to MySQL Enterprise Monitor 2.1, be aware of the following issues:
During the upgrade process, if you previously had a Query Analyzer data purge value that was greater than the standard data purge value, the historical data collection purge period is set to the Query Analyzer purge period. This is logged in the upgrade log with the following notice:
getDataCollectionPurgeLifespan now: 4 weeks (was: 2 weeks)
When upgrading to MySQL Enterprise Monitor 2.2, be aware of the following issues:
If you are upgrading to MySQL Enterprise Monitor 2.2, upgrade from MySQL Enterprise Monitor 2.0 or higher. If you are using MySQL Enterprise Monitor 1.3 or lower, upgrade to MySQL Enterprise Monitor 2.0 first before upgrading to MySQL Enterprise Monitor 2.2.
Rules and advisors in MySQL Enterprise Monitor 2.2 now support auto-close functionality if the issue that raised the notification is no longer causing a problem. Review all your existing rules schedules and confirm whether the auto-close feature is useful in each case.
The MySQL Enterprise Service Manager supports the use of a separate, self-managed, MySQL server in place of the MySQL server bundled with the MySQL Enterprise Service Manager installation for storing repository data. For more information, see Section 15.6.2.1, “Service Manager Installation Common Parameters”.
If you are upgrading MySQL Enterprise Service Manager which uses a remote, self-managed MySQL database to store the MySQL Enterprise Monitor repository data, then you should perform the installation as follows:
Shut down MySQL Enterprise Service Manager.
Shut down the MySQL instance supporting your MySQL Enterprise Monitor repository.
Upgrade the MySQL server as you would any other MySQL server instance. See Upgrading MySQL.
Ensure when performing the upgrade that the MySQL server instance is configured with support for InooDB and that the InooDB storage engine has been disabled. Also ensure that support for partitioning is available within the server.
Run the mysql_upgrade to ensure that the system tables have been correctly updated.
Restart the MySQL repository instance.
Restart MySQL Enterprise Service Manager and confirm that it was able to connect to the MySQL server.
If you are upgrading MySQL Enterprise Service Manager which uses a remote, self-managed MySQL database to store the MySQL Enterprise Monitor repository data, then you should perform the installation as follows:
Shut down MySQL Enterprise Service Manager.
Shut down the MySQL instance supporting your MySQL Enterprise Monitor repository.
Upgrade the MySQL server as you would any other MySQL server instance. See Upgrading MySQL.
Ensure when performing the upgrade that the MySQL server instance is configured with support for InooDB and that the InnoDB storage engine has been enabled. Also ensure that support for partitioning is available within the server.
Run the mysql_upgrade to ensure that the system tables have been correctly updated.
Restart the MySQL repository instance.
Restart MySQL Enterprise Service Manager and confirm that it can connect to the MySQL server.
When upgrading MySQL Enterprise Service Manager, the installer tries to determine if you are using a local MySQL server (as bundled with the MySQL Enterprise Service Manager) or a remote and self-managed MySQL server instance to store your repository data.
To determine whether the existing installation is using a local MySQL server, the installer examines the existing MySQL Enterprise Service Manager configuration file. If the value of the
mysql.serverconfiguration parameter is set to127.0.0.1orlocalhost, the installer assumes the MySQL server is local. If any value is identified, the installer assumes that the server is remote/self-managed and it does not upgrade the MySQL server component.If the correct MySQL server version and supported functionality (partitioning) are not supported by the MySQL server you are using, the installer stops.
The storage tables used for storing MySQL Enterprise Service Manager data, and the rules and methods required for purging old information, have changed in MySQL Enterprise Service Manager 2.2. You can improve the purging and disk space usage for these data tables by using the techniques shown in Section 15.15.7, “Improving Disk Space Usage with Purge in 2.1 and 2.2”.
For MySQL Enterprise Agent installations, the installer can now create a user on your MySQL server with suitable credentials. To perform this operation, the installer will request the root login and password for your MySQL server so that the user and other details can be updated.